
Food & Beverage
How to Cook a Tomahawk Steak to Perfection? The Art of Cooking a Juicy Tomahawk Steak
Cooking a Tomahawk steak to perfection is an art that combines technique, patience, and attention to detail. This impressive cut of meat, known for its long rib bone and rich marbling, requires careful preparation and cooking to achieve optimal results. So How to Cook a Tomahawk Steak to Perfection?
Selecting the Perfect Tomahawk Steak
When selecting the perfect tomahawk steak, there are several key factors to consider. First and foremost, look for high-quality meat with excellent marbling. The intramuscular fat distributed throughout the meat ensures a juicy, flavorful experience. Aim for steaks with a consistent, fine web of white lines running through the red meat.
Thickness is another crucial aspect. A proper tomahawk steak should be at least 2 inches thick, allowing for a beautiful crust on the outside while maintaining a juicy, medium-rare center. Don’t hesitate to ask your butcher for their recommendations on thickness and cut.
Speaking of butchers, their expertise can be invaluable. A knowledgeable butcher can provide insights into the meat’s origin, the aging process, and even offer cooking tips. They may also be able to custom-cut a tomahawk steak to your specifications.
The aging process is worth considering as well. Dry-aged beef develops a more complex flavor profile and tenderness. However, wet-aged beef can also be excellent and is often more readily available. Ask about the aging method and duration to make an informed choice.
The perfect tomahawk steak is a combination of quality meat, proper thickness, expert butchery, and appropriate aging. By paying attention to these factors, you’ll be well on your way to selecting a steak that will impress even the most discerning palates.
Preparing Your Tomahawk Steak for Cooking

Before cooking your tomahawk steak, proper preparation is key to achieving the best flavor and texture. Start by removing the steak from the refrigerator about 30-60 minutes before cooking, allowing it to come to room temperature. This ensures even cooking throughout the meat.
Seasoning techniques vary, but a simple salt and pepper combination can enhance the steak’s natural flavors. For those seeking more complexity, consider a dry rub recipe incorporating herbs and spices like garlic powder, paprika, and rosemary. Apply the seasoning generously, gently pressing it into the meat’s surface.
If you prefer a marinade, options like a red wine-based sauce or a mixture of olive oil, balsamic vinegar, and herbs can add depth to the flavor profile. However, avoid marinating for too long, as the acidity can affect the meat’s texture.
The tomahawk’s impressive size and marbling already contribute significantly to its taste, so don’t overshadow these natural qualities with excessive seasoning. A well-prepared tomahawk steak, whether simply seasoned or elaborately flavored, sets the stage for an unforgettable dining experience.
Step-by-Step Guide: Grilling a Tomahawk Steak
1. Preheating the Grill:
Start by preheating your grill to high heat, around 450-500°F. This ensures a proper sear and helps lock in the steak’s juices.
2. Direct vs Indirect Heat:
Set up your grill for two-zone cooking. One side should have direct high heat for searing, while the other side should have indirect heat for slower cooking.
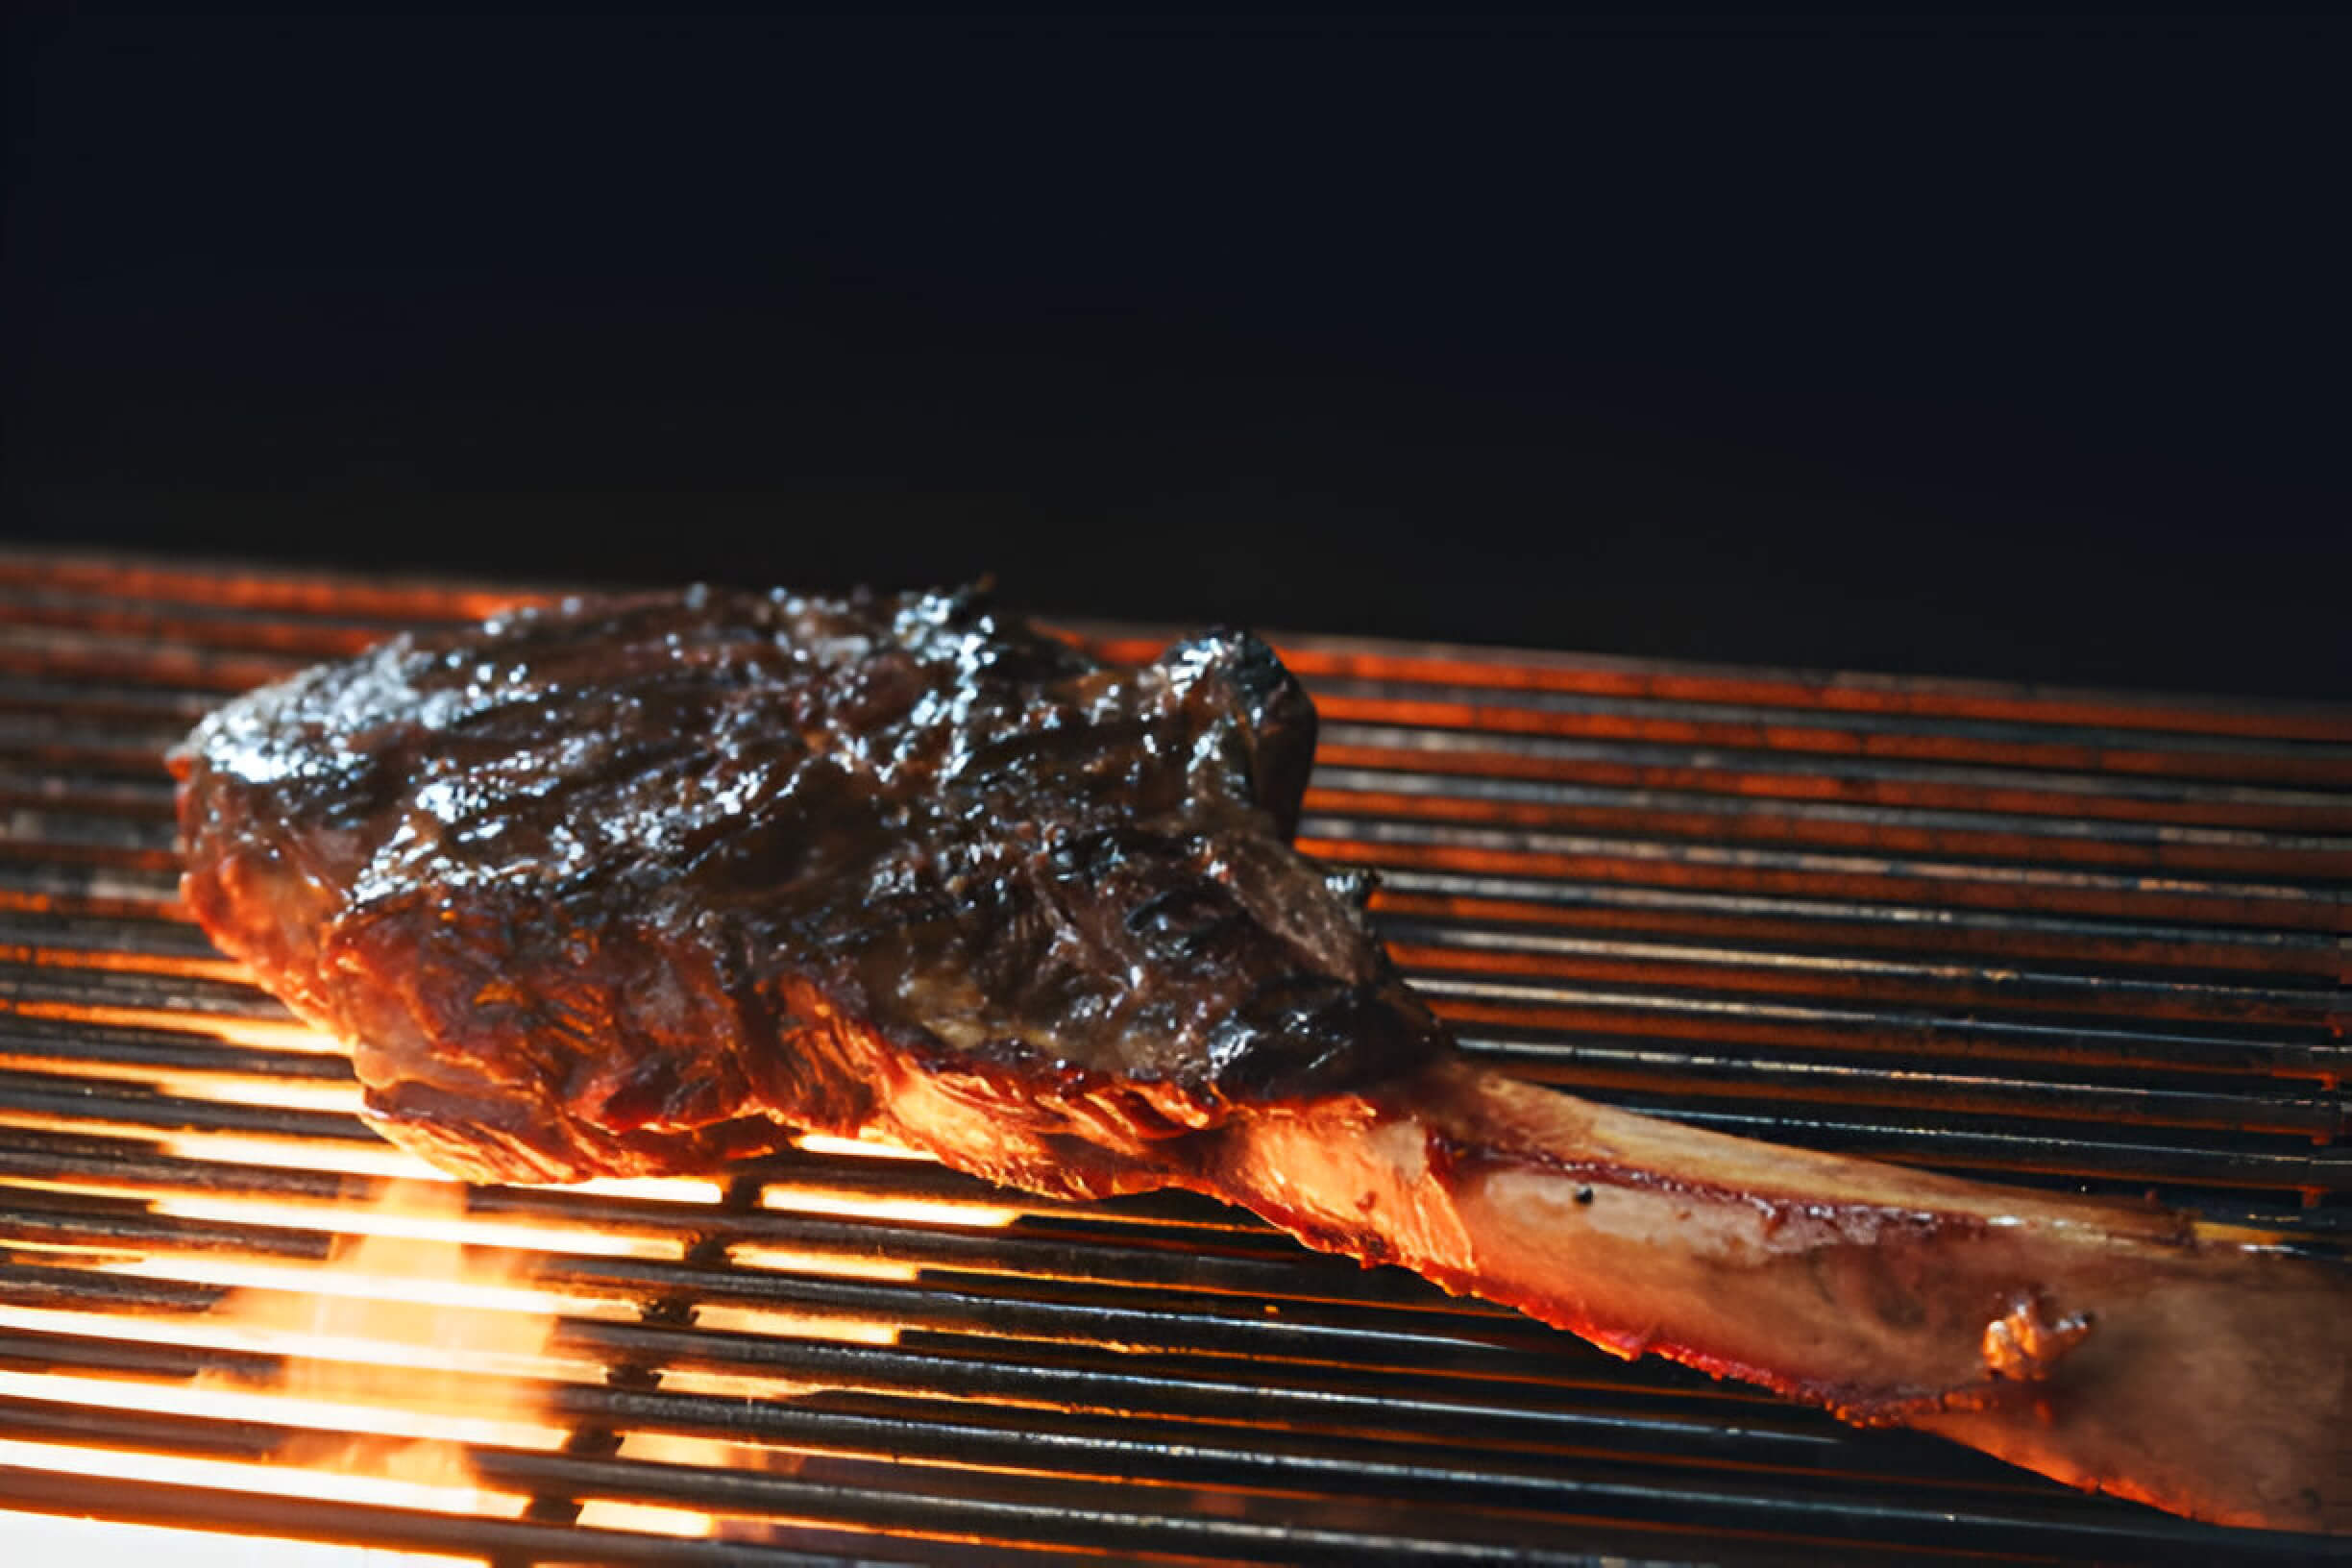
3. Searing the Steak:
Place the Tomahawk steak on the direct heat side. Sear for 2-3 minutes on each side to develop a flavorful crust.
4. Flipping Techniques:
Use tongs to flip the steak, avoiding piercing the meat with forks. This helps retain the juices. Flip only once during the searing process for optimal results.
5. Indirect Heat Cooking:
Move the steak to the indirect heat side. Close the grill lid and continue cooking until desired doneness is reached.
6. Internal Temperature Guide:
Use a meat thermometer to check doneness:
– Rare: 125°F
– Medium-rare: 135°F
– Medium: 145°F
– Medium-well: 150°F
– Well-done: 160°F
7. Resting the Steak:
Once the desired temperature is reached, remove the steak from the grill and let it rest for 5-10 minutes before slicing and serving.
By following this guide, you’ll be able to grill a perfect Tomahawk steak with a juicy interior and a flavorful crust.
Achieving the Perfect Internal Temperature
Achieving the perfect internal temperature is crucial for cooking meat to your desired level of doneness. Whether you prefer your steak rare, medium-rare, medium, or well-done, using a meat thermometer is the most accurate way to ensure your desired result.
For rare steaks, aim for an internal temperature of 125°F (52°C). This will yield a cool, red center. Medium-rare, a favorite among steak enthusiasts, should reach 135°F (57°C), resulting in a warm, red center. If you prefer medium, cook until the internal temperature hits 145°F (63°C) for a warm, pink center. Well-done steaks should reach 160°F (71°C), with little to no pink remaining.
To use a meat thermometer effectively, insert it into the thickest part of the meat, avoiding fat or bone. For thinner cuts, insert the thermometer from the side. Remember that the temperature will continue to rise slightly after removing the meat from heat, a phenomenon known as carryover cooking. To account for this, remove the meat from heat when it’s about 5°F below your target temperature.
By mastering the use of a meat thermometer and understanding target temperatures, you’ll consistently achieve perfectly cooked meat that meets your preferences and ensures food safety.
Resting and Serving Your Tomahawk Steak
After cooking your tomahawk steak to perfection, it’s crucial to allow adequate resting time. Let the steak rest for 5-10 minutes per inch of thickness, allowing the juices to redistribute throughout the meat. This ensures a more flavorful and tender eating experience.
When it’s time to serve, remember to cut against the grain. This technique breaks down the muscle fibers, resulting in a more tender bite. For an impressive presentation, consider slicing the steak and arranging it on a wooden board or large platter.
To elevate your tomahawk steak, consider pairing it with complementary accompaniments. Classic sides like roasted vegetables, garlic mashed potatoes, or a crisp salad work well. For an extra touch of indulgence, serve with compound butter or a rich sauce like béarnaise or peppercorn.
Don’t forget about the visual appeal. Garnish your platter with fresh herbs like rosemary or thyme, and add a sprinkle of coarse sea salt just before serving to enhance both flavor and presentation.
Common Mistakes to Avoid When Cooking Tomahawk Steak
When preparing a luxurious Tomahawk steak, it’s crucial to avoid common pitfalls that can compromise its quality. One of the most frequent errors is overcooking, which can turn this prized cut into a tough, dry disappointment. Always use a meat thermometer to ensure you achieve your desired level of doneness.
Underseasoning is another mistake to steer clear of. The Tomahawk’s substantial size requires generous seasoning to enhance its natural flavors. Don’t be shy with salt and pepper, applying them evenly across the entire surface of the steak.
Failing to let the steak rest after cooking is a critical error that many novice cooks make. Resting allows the juices to redistribute throughout the meat, ensuring a more flavorful and tender result. Aim for a resting period of 5-10 minutes, tented loosely with foil.
Lastly, cooking at the wrong temperature can lead to subpar results. Start with a high heat to achieve a nice crust, then lower the temperature to cook the interior evenly. For optimal results, consider using the reverse sear method, which involves slow-cooking the steak at a low temperature before finishing it with a high-heat sear.
Boba tea, or bubble tea, combines chewy tapioca pearls and flavorful tea. Originating in Taiwan in the 1980s, it has become a global sensation with diverse flavors and textures. This guide explores the uniqueness of tapioca pearls, and provides a step-by-step recipe to make your own. Whether you’re a seasoned fan or new to this trendy drink, join us on a journey through the world of bubble tea.
What is Boba Made Of? Understanding the Ingredients
Boba, also known as bubble tea, has become a beloved beverage worldwide, but many people are curious about what gives boba its unique texture and flavor. The primary ingredient in boba is tapioca pearls, which are responsible for the drink’s signature chewy texture. These pearls are made from tapioca starch derived from the cassava root.
The process begins by extracting starch from the cassava root. This starch is then mixed with water and other ingredients to form a dough-like consistency. Small balls are rolled out of this dough and cooked until they achieve their characteristic chewy texture. The cooking process typically involves boiling the pearls until they become soft yet resilient.
In addition to traditional white tapioca pearls, black pearls are also popular in boba drinks. These black pearls get their color from brown sugar or caramel added during the preparation process, giving them a slightly sweeter taste compared to their white counterparts.
Understanding these key ingredients (tapioca starch from cassava root and optional sweeteners) helps us appreciate the craftsmanship behind every cup of bubble tea. Whether you prefer your boba with milk tea or fruit flavors, knowing what goes into making those delightful chewy pearls can enhance your overall experience of this trendy beverage.
The Science Behind the Chewy Texture of Boba Pearls
Boba pearls, those delightful chewy spheres found in bubble tea, owe their unique texture to the properties of tapioca starch. Tapioca starch, derived from the cassava root, has a high amylose content which plays a crucial role in creating the gelatinous texture that boba enthusiasts love.
During the cooking process of boba pearls, tapioca starch is mixed with boiling water to form a dough. This dough is then rolled into small balls and cooked again in boiling water. The heat causes the starch granules to swell and gelatinize, forming a network that traps water and creates that characteristic chewiness.
The precise balance of temperature and time during cooking is essential to achieve perfect boba pearls. Overcooking can lead to overly soft pearls, while undercooking results in hard centers. Mastering this process ensures that each pearl maintains its delightful bite (firm yet yielding), which is a textural experience that’s central to enjoying boba tea.
Understanding these scientific principles not only enhances our appreciation for this popular treat but also opens up possibilities for experimenting with different textures by adjusting variables like cooking time and temperature.
How to Make Boba Pearls at Home: Step-by-Step Guide
Making boba pearls at home can be a fun and rewarding experience. This step-by-step guide will walk you through the process of creating your own chewy tapioca pearls, perfect for your homemade bubble tea.
Ingredients for Making Boba at Home
To get started, you’ll need the following ingredients:
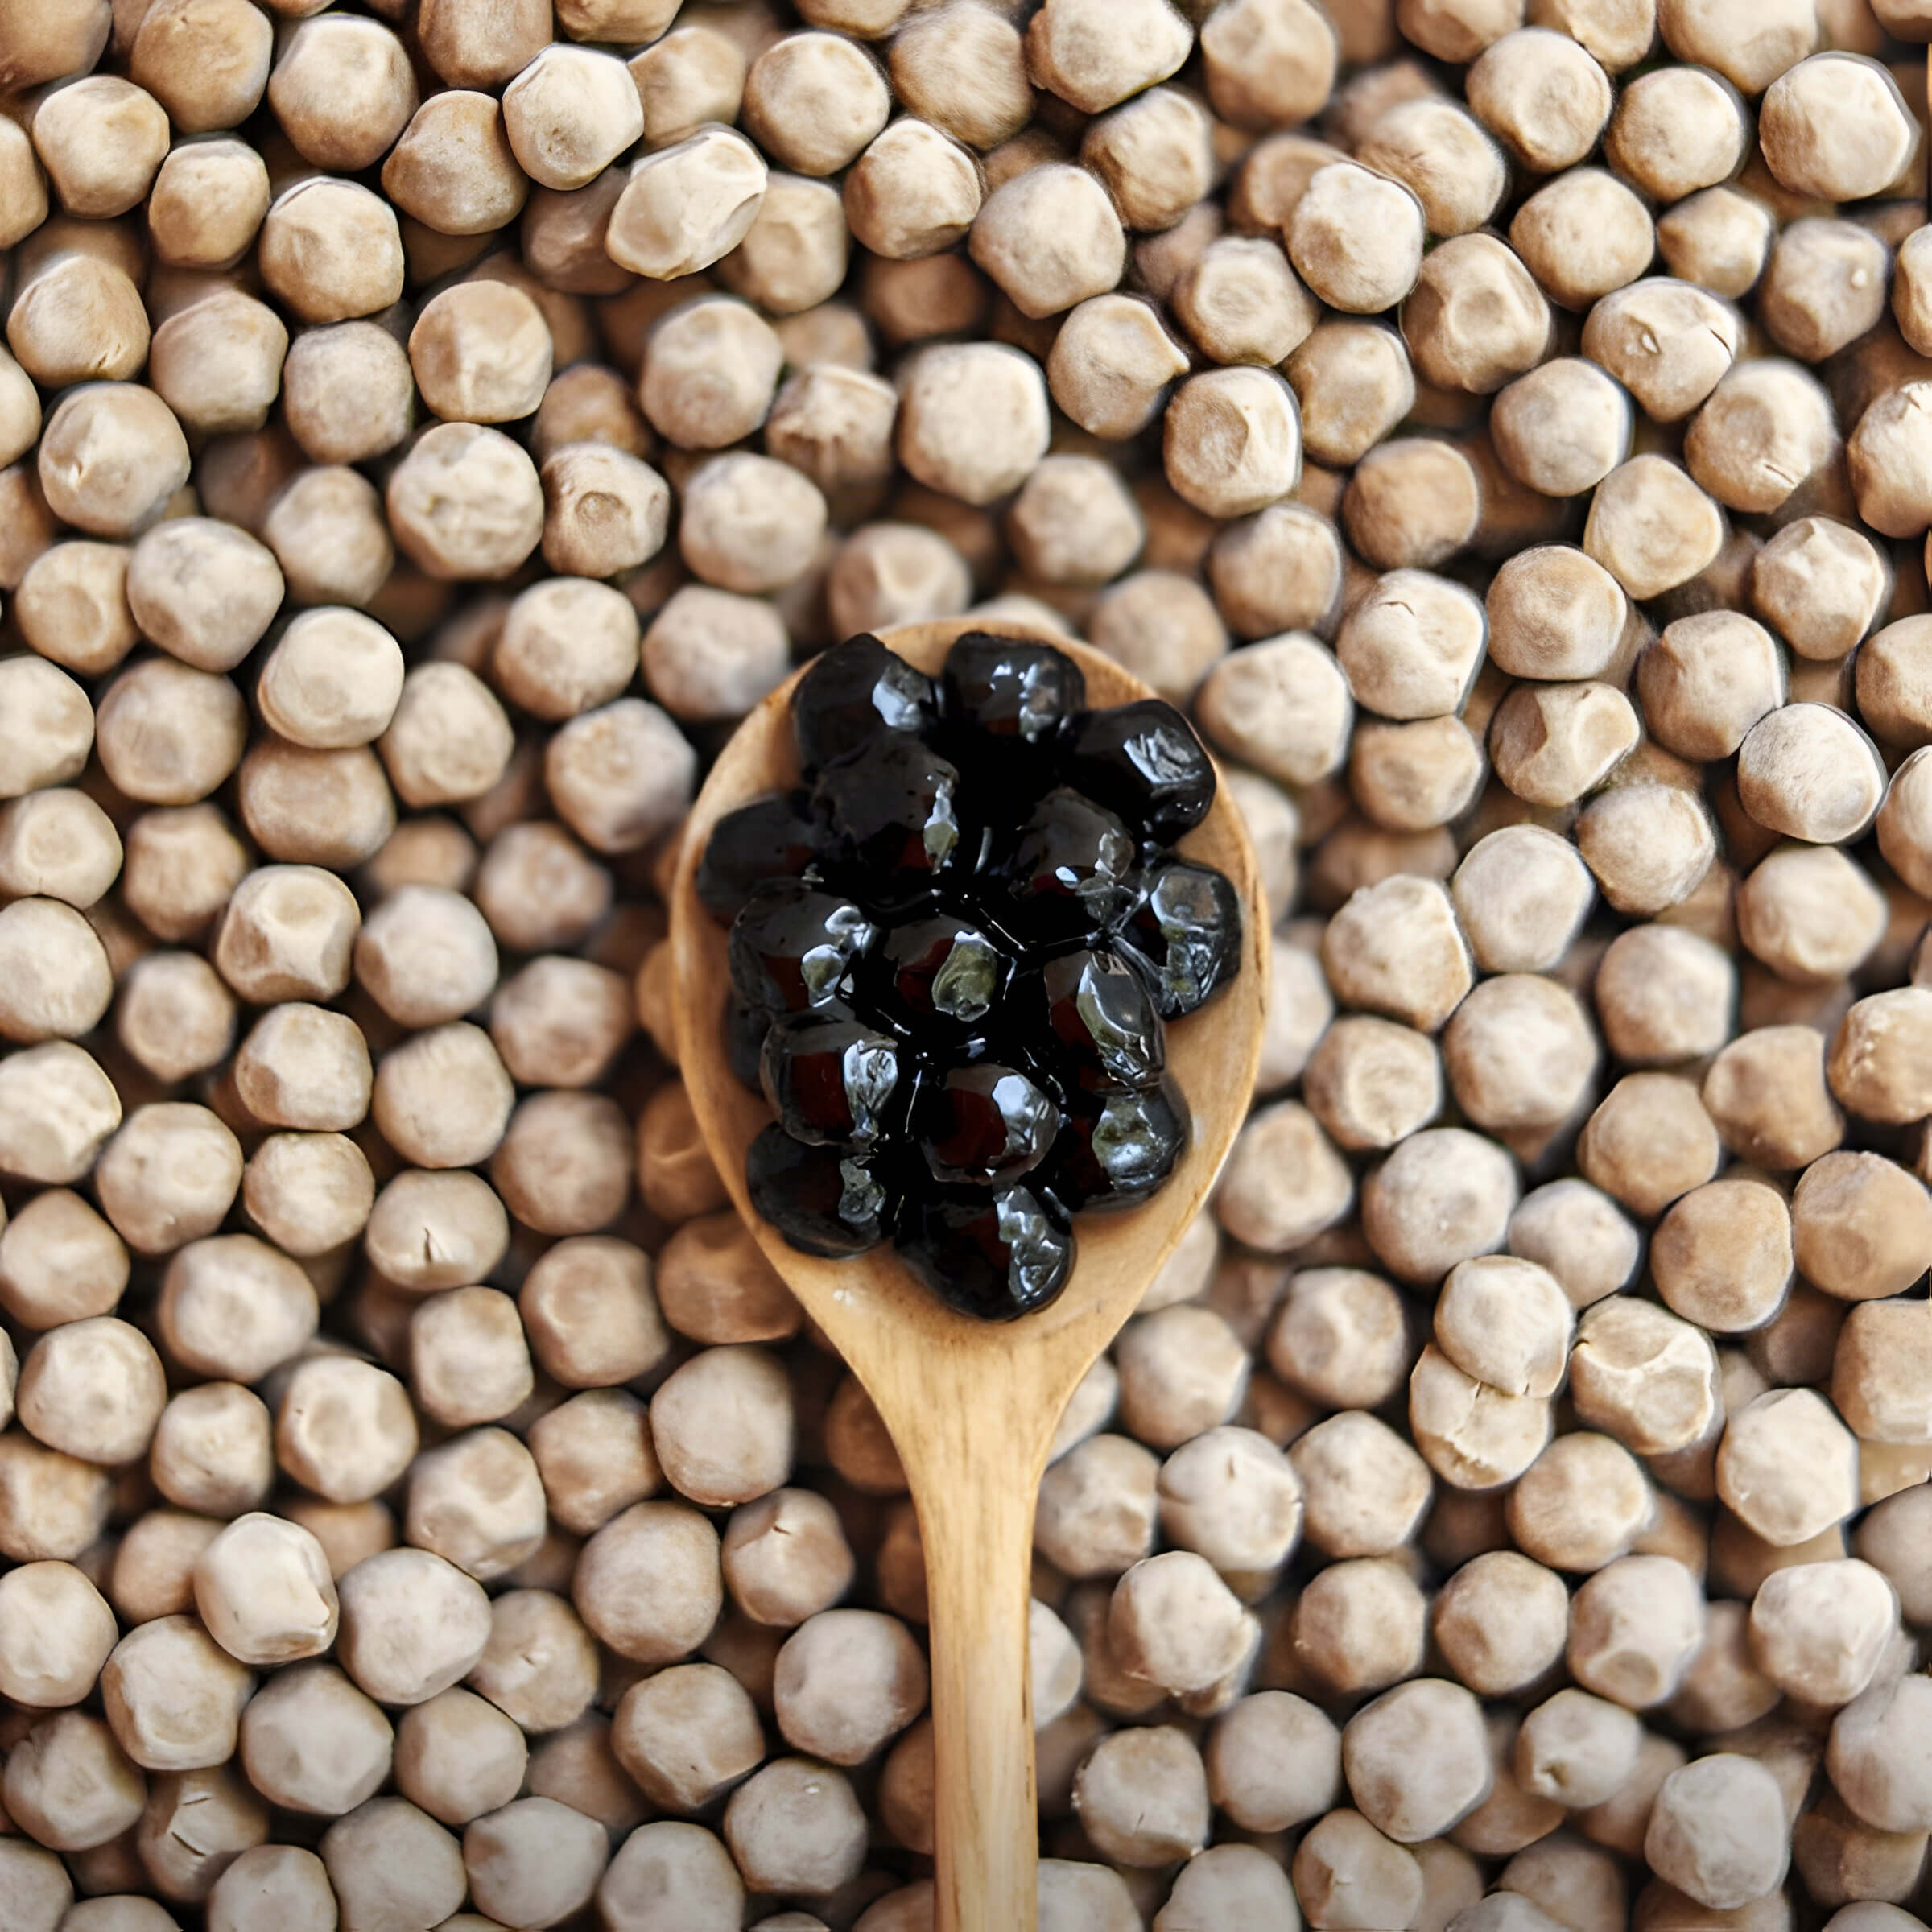
– 1 cup of tapioca starch
– 1/2 cup of water
– 2 tablespoons of brown sugar (or black sugar for a richer flavor)
– A pinch of food coloring (optional)
Step-by-Step Guide to DIY Boba Pearls Recipe
Step 1. Preparing the Dough
Begin by heating the water and brown sugar in a small pot over medium heat. Stir until the sugar is completely dissolved. Once it reaches a gentle boil, gradually add half of the tapioca starch while continuously stirring to avoid lumps. The mixture will start to thicken quickly.
Step 2. Forming the Dough
Remove the pot from heat and add the remaining tapioca starch. Mix well until it forms a dough-like consistency. If it’s too sticky, add more tapioca starch as needed.
Step 3. Shaping the Pearls
Once your dough is ready, let it cool slightly before handling it. Roll small portions of dough into long thin ropes on a flat surface dusted with tapioca starch to prevent sticking. Cut these ropes into small pieces and roll each piece between your palms to form tiny balls or pearls.
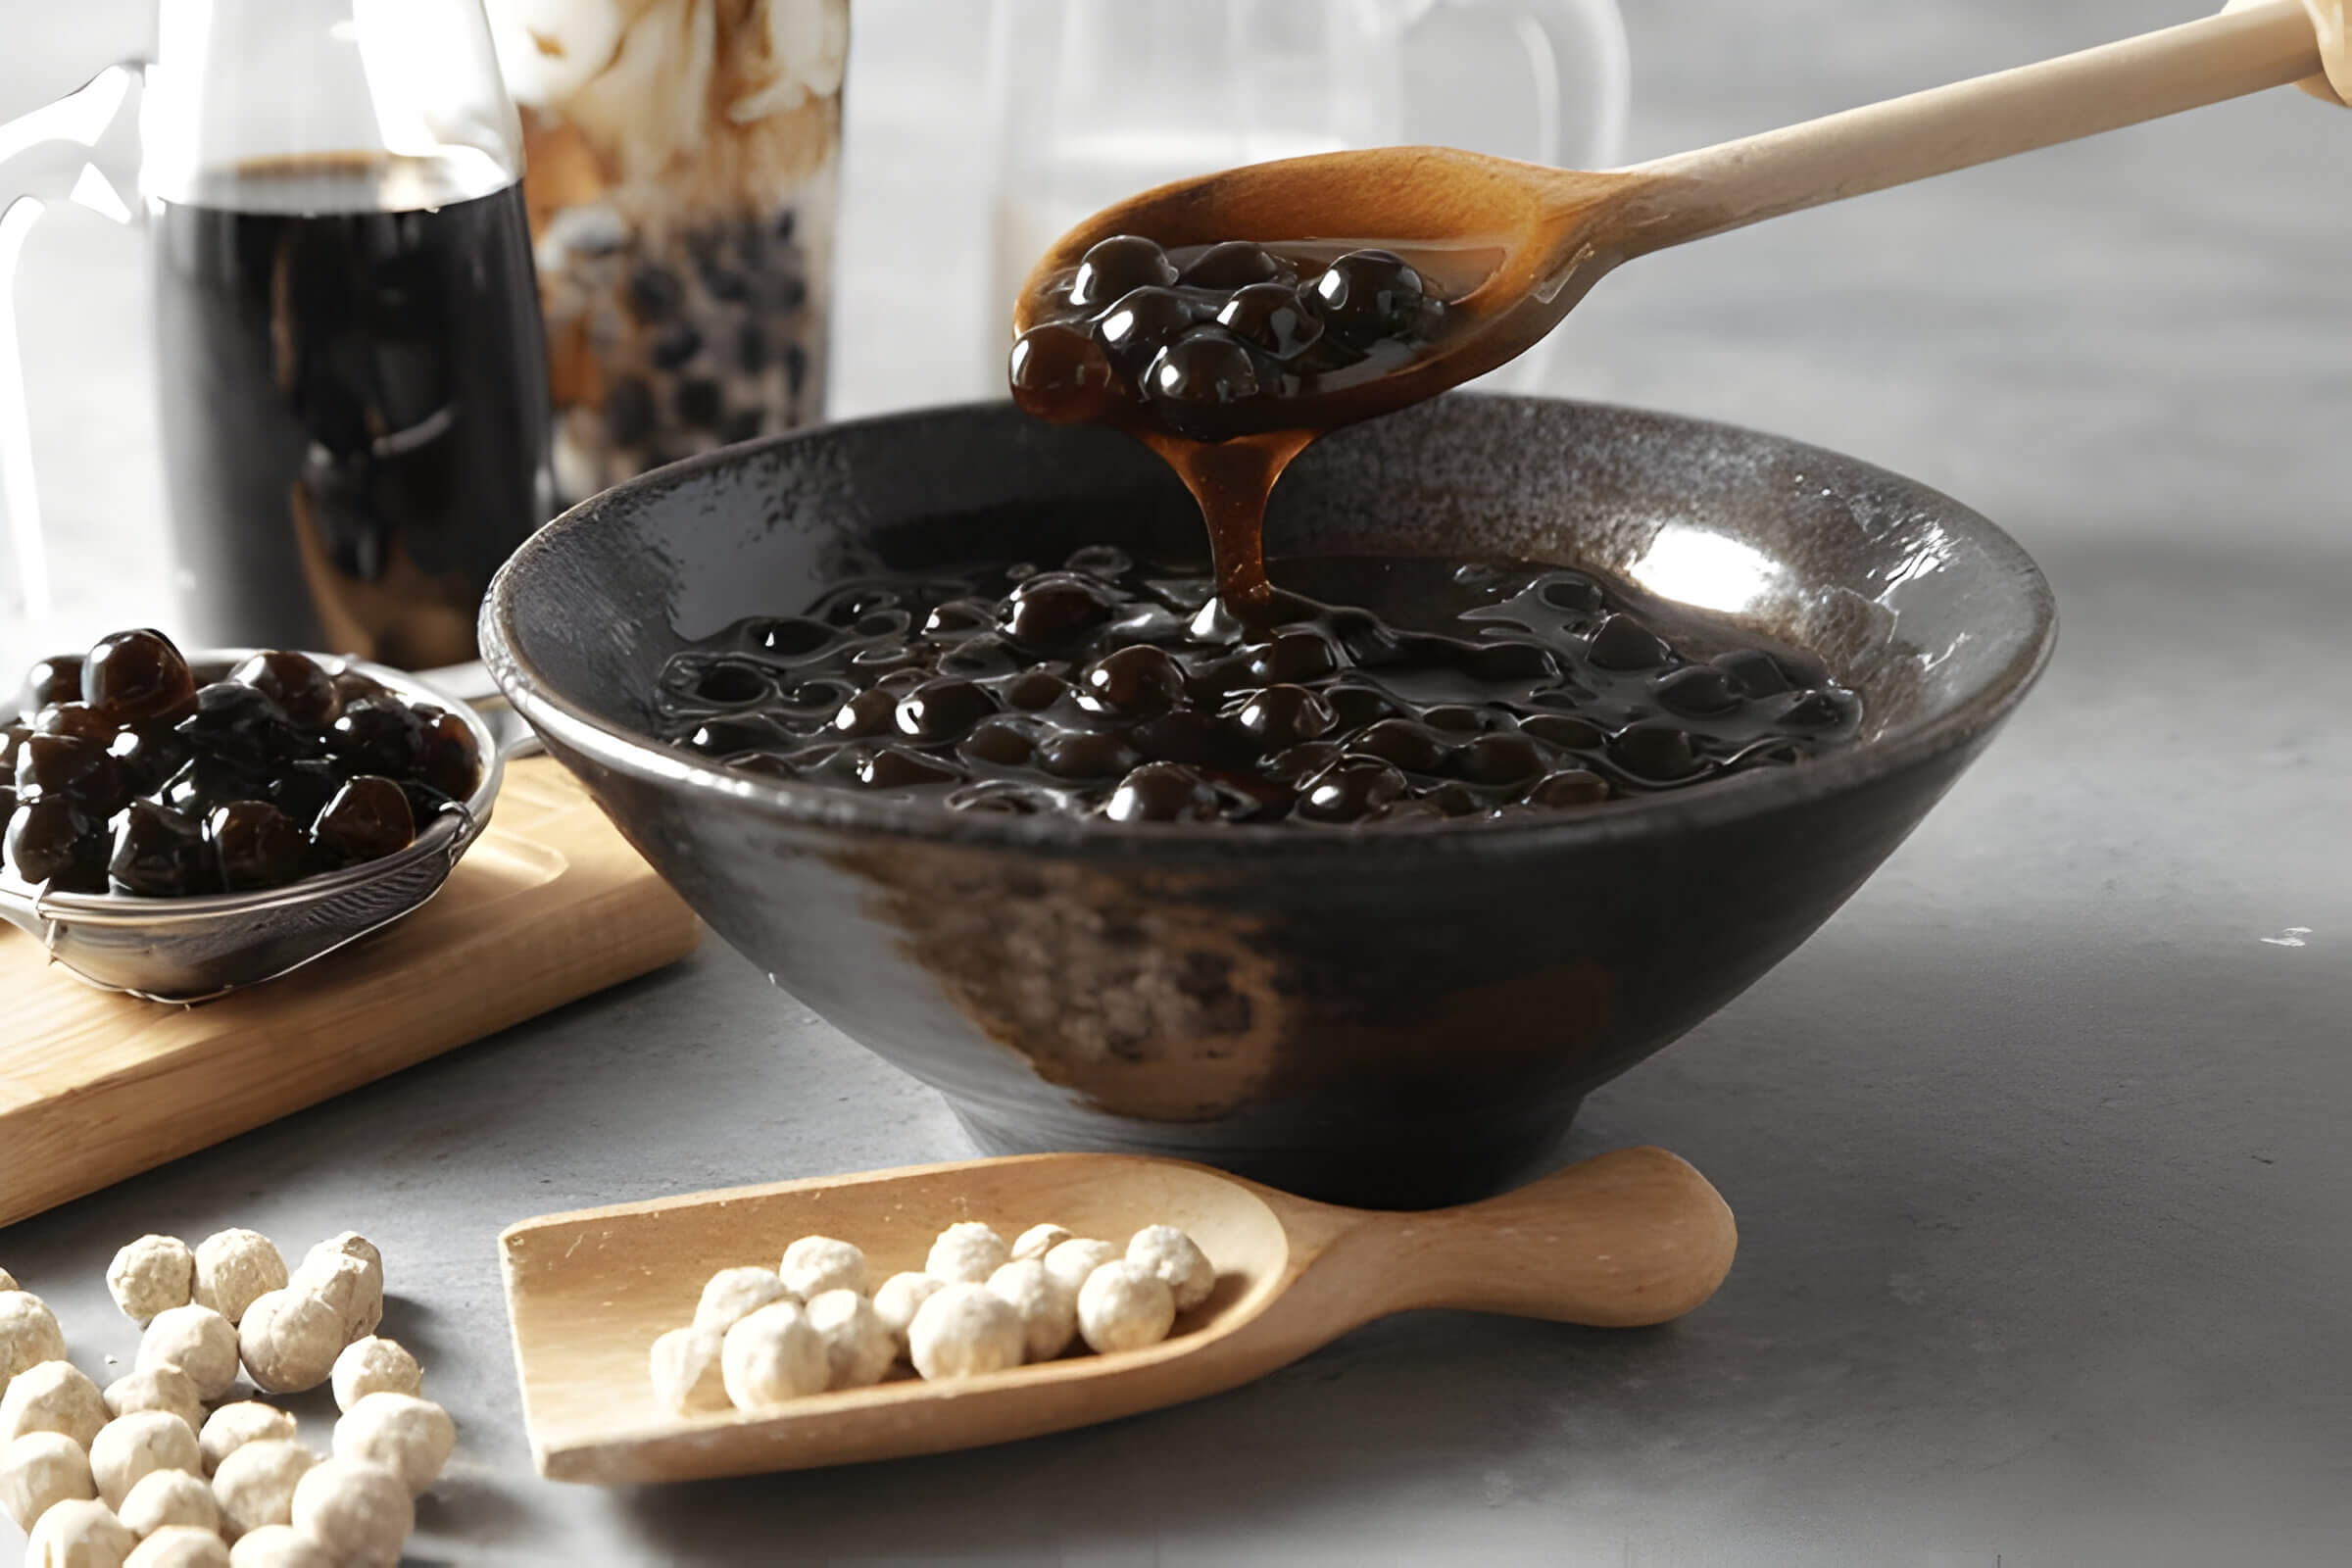
Step 4. Cooking the Boba Pearls
Bring a large pot of water to boil and add your homemade boba pearls. Stir occasionally to prevent them from sticking together. Cook for about 15-20 minutes or until they float to the surface and achieve that signature chewy texture.
Step 5. Sweetening Your Pearls (Optional)
For added sweetness, you can soak your cooked boba pearls in simple syrup made from equal parts water and brown sugar.
Now that you have your homemade tapioca pearls ready, you can add them to your favorite bubble tea recipe or any other drink you’d like!
The Perfect Bubble Tea Recipe (Combining Tea and Boba Pearls)
Creating the perfect bubble tea recipe at home is easier than you might think. Here’s how to brew bubble tea that rivals your favorite shop’s offerings.
Start by preparing the boba pearls. Bring a pot of water to a boil and add the tapioca pearls, cooking them until they float to the surface and achieve a chewy consistency. This typically takes about 5-7 minutes. Once cooked, drain the pearls and rinse them with cold water before soaking them in a simple syrup made from equal parts sugar and water.
Next, focus on brewing your tea base. For classic bubble tea flavors like black or green milk tea with boba, steep high-quality loose-leaf black or green tea in hot water for 3-5 minutes. The strength of your brew will greatly influence the final taste of your bubble tea.
To assemble your drink, combine the brewed tea with milk or a non-dairy alternative to create a creamy texture. Sweeten it to taste using sugar or flavored syrups. Fill a glass with ice cubes, pour in your milk-tea mixture, and then add the soaked boba pearls.
Experimenting with different teas and flavorings can lead you to discover new favorites while mastering how to brew bubble tea at home. Whether you prefer traditional options like jasmine green milk tea or adventurous blends like taro or matcha, this versatile drink offers endless possibilities for customization. Enjoy crafting your perfect cup of bubble tea!
Exploring Different Flavors and Variations of Bubble Tea
When exploring bubble tea variations, one can start with the basic distinction between creamy and fruity bubble teas. Creamy bubble teas often use milk or non-dairy alternatives as their base, resulting in a rich and smooth texture. Popular examples include classic milk tea, taro milk tea, and matcha latte. These variations are typically paired with chewy tapioca pearls or other add-ins like pudding or jelly.
On the other hand, fruit-flavored bubble teas offer a refreshing alternative to their creamy counterparts. These beverages usually feature a blend of fruit juices or purees mixed with green or black tea. Some popular choices include mango, strawberry, and passion fruit bubble teas. The vibrant flavors make these drinks particularly appealing during warmer months.
Whether you prefer the indulgent creaminess of traditional milk teas or the zesty freshness of fruit-flavored options, there is undoubtedly a bubble tea variation that will satisfy your cravings. As you explore different flavors and combinations, you’ll discover why this versatile drink continues to captivate taste buds around the globe.
Vinegar, a kitchen staple worldwide, has a rich history and versatile applications. This guide explores the science behind vinegar production, detailing the fermentation process where alcohol turns into acetic acid with specific bacteria. It covers both commercial methods and home crafting essentials. Whether you’re troubleshooting issues or discovering benefits of homemade vinegar, this guide provides valuable insights for all DIY enthusiasts.
The Science Behind Vinegar Production
Vinegar, a staple in kitchens around the world, owes its unique tangy flavor to a fascinating biochemical process. At the heart of vinegar production is the vinegar fermentation process, which involves the conversion of alcohol into acetic acid. This transformation is primarily driven by acetic acid bacteria (AAB), a group of microorganisms that thrive in environments rich in ethanol.
The journey from alcohol to acetic acid begins when these bacteria oxidize ethanol (the type of alcohol found in beverages like wine and beer) to produce acetic acid. This biochemical reaction occurs in two main stages: first, ethanol is converted into acetaldehyde by an enzyme called alcohol dehydrogenase; then, acetaldehyde is further oxidized into acetic acid by another enzyme known as aldehyde dehydrogenase.
For optimal vinegar production, specific conditions must be maintained. The presence of oxygen is crucial since AAB are aerobic organisms that require oxygen to function effectively. Additionally, temperature and pH levels need to be carefully controlled to ensure the bacteria remain active and productive throughout the fermentation process.
Understanding this intricate interplay between microorganisms and their environment not only highlights the complexity behind something as simple as vinegar but also underscores the importance of scientific principles in everyday food production processes.
Commercial Methods of Making Vinegar
Vinegar, a versatile and widely used product, is produced through various commercial methods to meet the demands of different industries. Industrial vinegar production primarily involves large-scale fermentation processes that efficiently convert ethanol into acetic acid. The two main commercial vinegar making methods are the Orleans process and the submerged fermentation process.
The Orleans Process is one of the oldest methods of producing vinegar on a commercial scale. It relies on natural fermentation, where alcohol-containing liquids such as wine or cider are exposed to air in wooden barrels. Over time, acetic acid bacteria convert the ethanol into acetic acid. This method is known for producing high-quality vinegar with rich flavors but is relatively slow and less efficient for large-scale production.
In contrast, the Submerged Fermentation Process is commonly used in modern industrial settings due to its efficiency and scalability. This method employs stainless steel fermenters with continuous aeration systems that supply oxygen to submerged cultures of acetic acid bacteria. The constant supply of oxygen accelerates the conversion rate of ethanol to acetic acid, allowing for rapid production cycles and higher yields compared to traditional methods.
Both these commercial vinegar-making methods play crucial roles in ensuring a steady supply of this essential condiment across various sectors, from culinary applications to industrial uses like cleaning agents and preservatives. As technology advances, innovations in large-scale vinegar fermentation continue to enhance production efficiency while maintaining quality standards.
Essential Ingredients and Tools for Homemade Vinegar
Creating your own vinegar at home can be a rewarding and fulfilling process, but it requires some essential ingredients and tools to ensure success. Understanding these basics will help you produce high-quality homemade vinegar that you can use in various culinary applications.
Homemade Vinegar Ingredients
The primary ingredient for making vinegar is a source of alcohol. Most commonly, people use wine, beer, or cider as the base. For those looking to experiment, almost any alcoholic beverage can be converted into vinegar. Another crucial ingredient is a mother of vinegar—a culture of acetic acid bacteria—that kickstarts the fermentation process.
Tools for Making Vinegar at Home
- Glass or Ceramic Containers: Non-reactive containers are essential to avoid any unwanted chemical reactions during fermentation. Glass jars or ceramic crocks are ideal choices.
- Cheesecloth or Coffee Filters: These materials are used to cover the containers, allowing air to circulate while keeping contaminants out.
- Rubber Bands: To secure the cheesecloth or coffee filters in place over your container.
- Thermometer: Maintaining an optimal temperature range (60-80°F) is crucial for encouraging bacterial activity.
- pH Strips: Monitoring the acidity level ensures that your vinegar reaches the desired pH level (around 2-3).
Basic Supplies for Homemade Vinegar
In addition to the ingredients and tools mentioned above, you’ll also need clean water (preferably filtered), measuring cups and spoons for accuracy, and sterilized bottles for storing your finished product.
By assembling these essential ingredients and tools, you’ll be well-equipped to embark on your homemade vinegar journey with confidence and precision.
A Step-by-Step Guide to Making Vinegar at Home
Making vinegar at home is a rewarding and straightforward process that allows you to create a versatile ingredient for your culinary needs. Here’s a step-by-step guide to help you get started with your DIY vinegar recipe.
Step 1. Gather Your Ingredients and Equipment
To start your homemade vinegar batch, you’ll need the following:
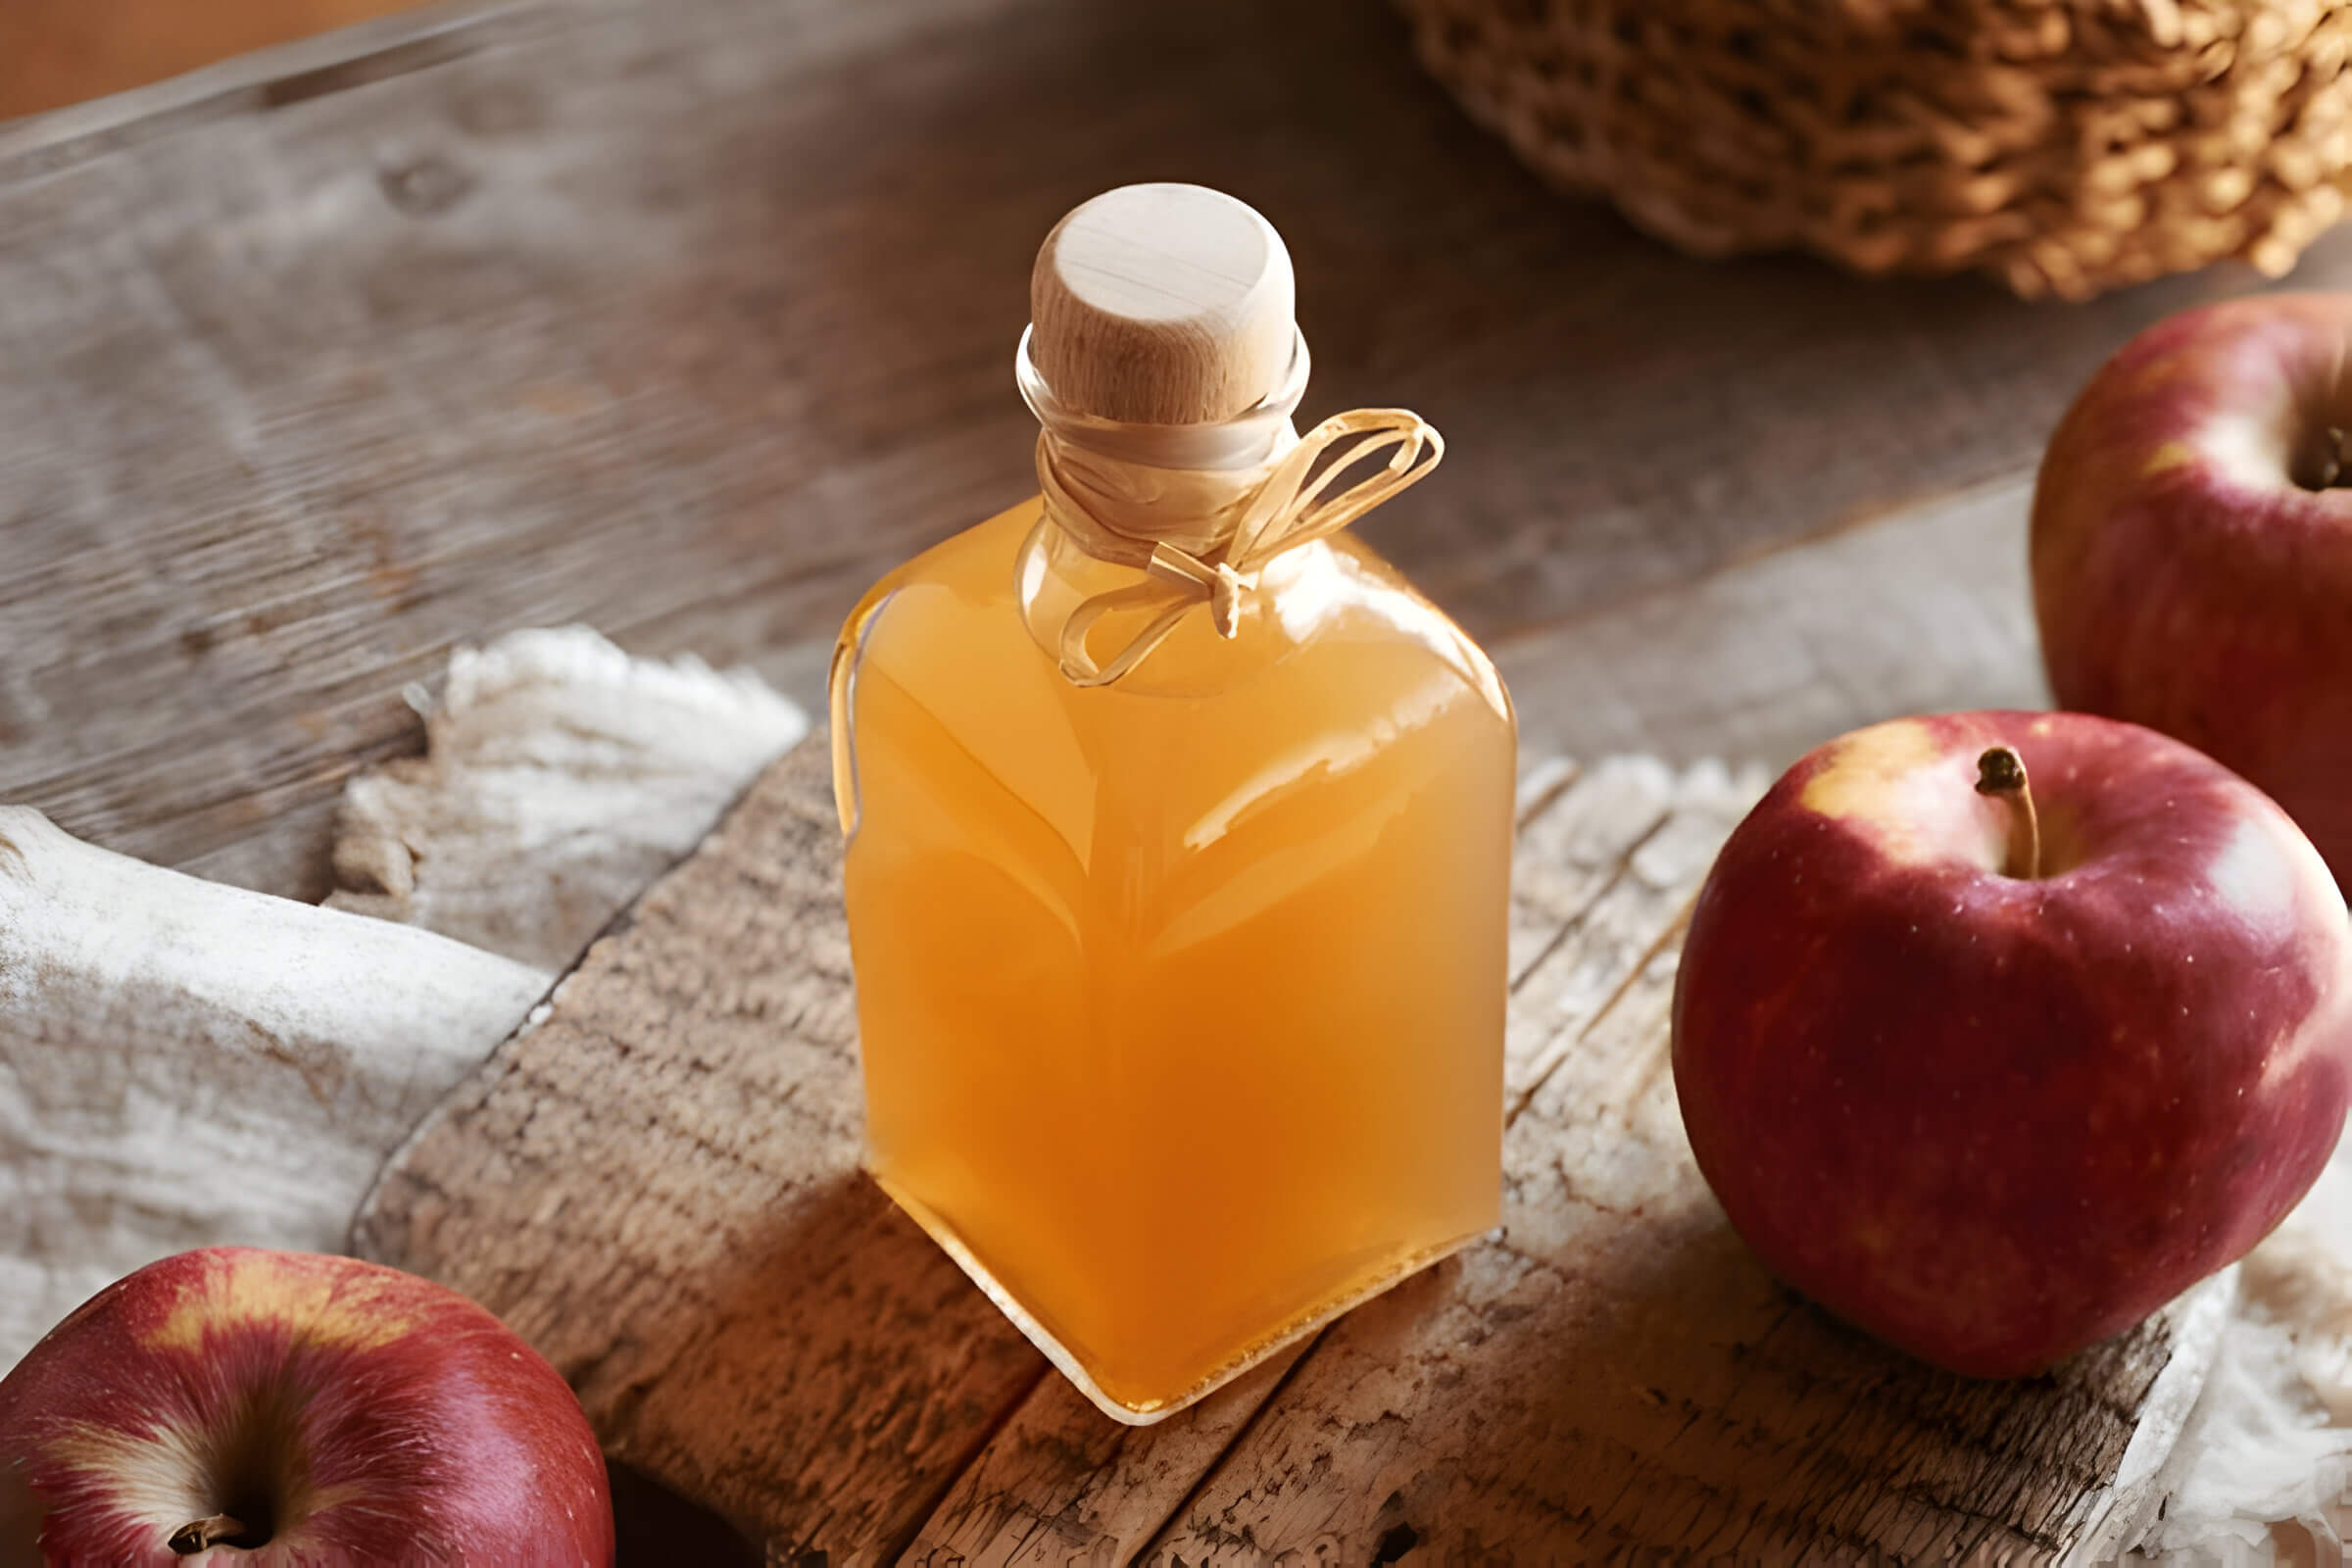
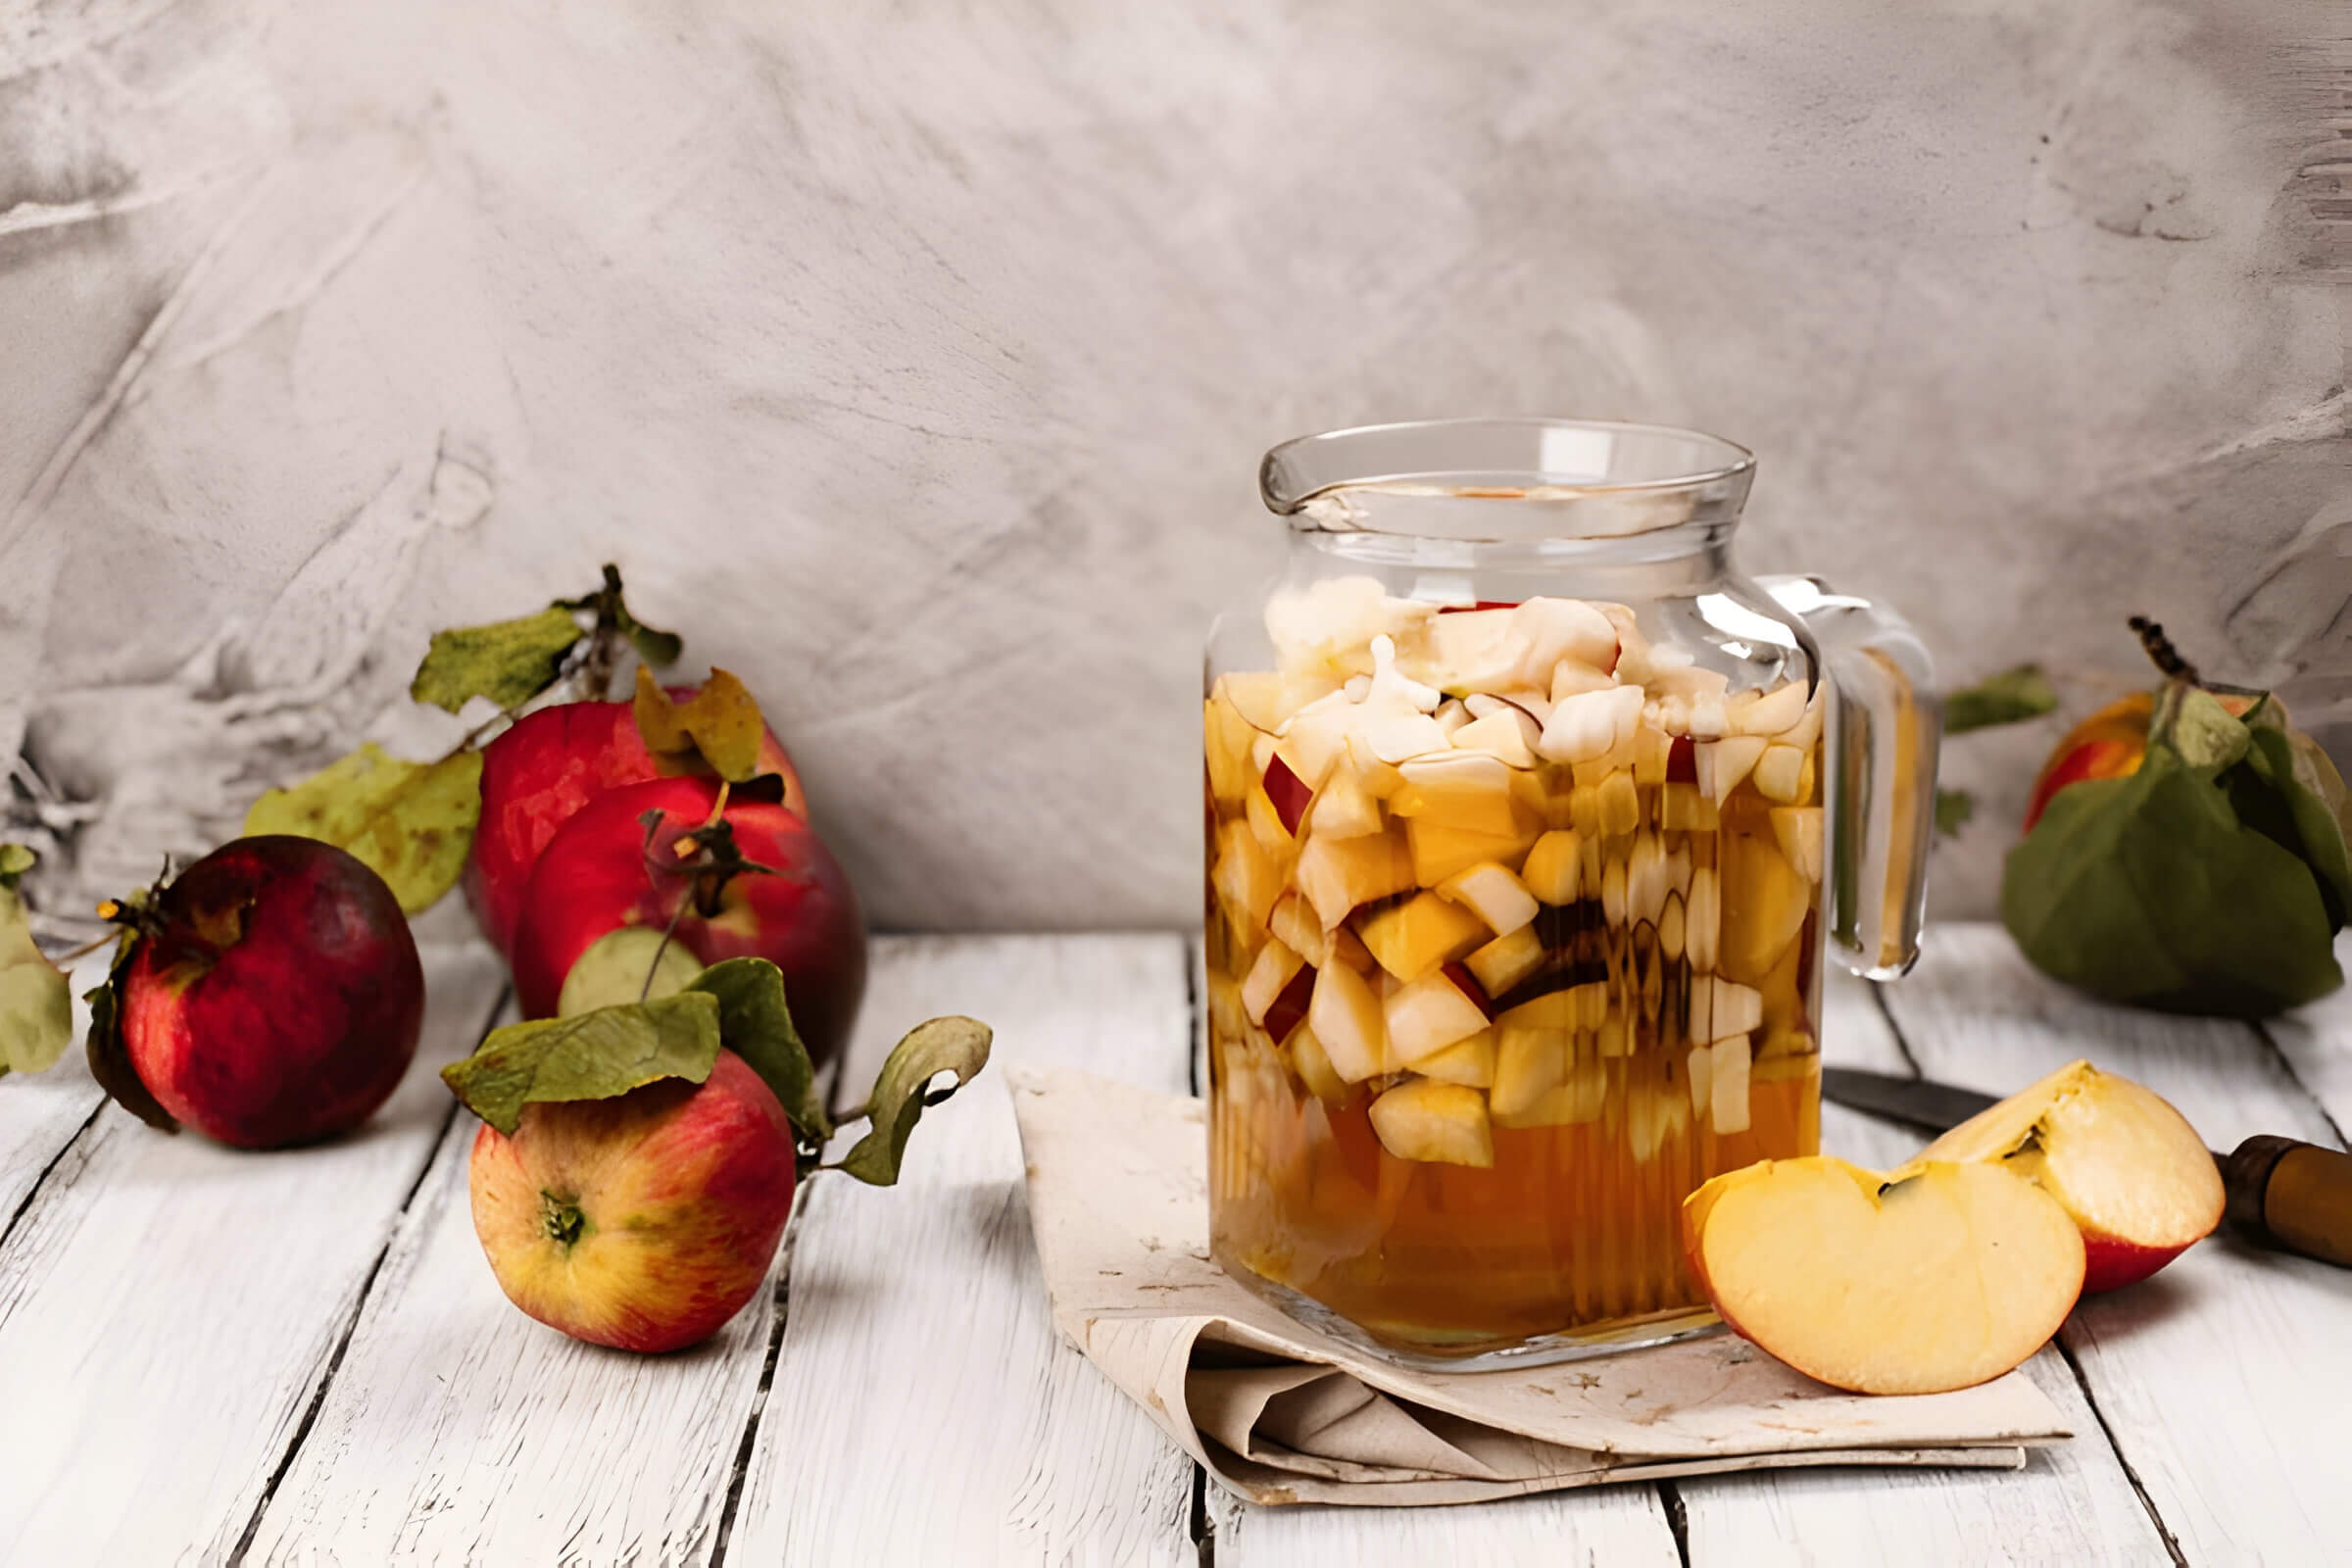
– A large glass jar or ceramic container
– Fruit scraps (apples are commonly used)
– Sugar
– Water
– Cheesecloth or a breathable fabric
Step 2. Prepare the Fruit Scraps
Wash your fruit scraps thoroughly to remove any dirt or pesticides. Cut them into small pieces if they aren’t already, ensuring there’s enough surface area for fermentation.
Step 3. Mix the Ingredients
Place the fruit scraps in your container. For every cup of fruit, add one tablespoon of sugar and enough water to cover the fruit completely. Stir well to dissolve the sugar.
Step 4. Cover and Store
Cover the container with cheesecloth or breathable fabric secured with a rubber band. This allows air to circulate while keeping out bugs and debris. Store it in a dark, warm place at room temperature (60-80°F) for about two weeks.
Step 5. Stir Daily
Stir the mixture daily to promote even fermentation. You’ll notice bubbles forming after a few days; this is a sign that fermentation is taking place.
Step 6. Strain and Ferment Further
After two weeks, strain out the solid fruit pieces using a fine mesh sieve or cheesecloth. Transfer the liquid back into the cleaned container, cover it again with cheesecloth, and let it ferment for another three to four weeks.
Step 7. Taste Test and Bottle
Taste your vinegar periodically until it reaches your desired level of acidity. Once satisfied, transfer it into clean bottles with airtight lids for storage.
By following this easy homemade vinegar guide, you’ll have fresh, flavorful vinegar ready for use in salads, marinades, pickling solutions, and more!
Troubleshooting Common Issues in Homemade Vinegar Production
Making your own vinegar at home can be a rewarding experience, but it’s not without its challenges. Understanding the common issues in DIY vinegar production can help you troubleshoot and perfect your process. Here are some typical vinegar making problems and how to fix them:
- Slow Fermentation: One of the most frequent issues is slow or stalled fermentation. This can be caused by low temperatures, insufficient oxygen, or an improper balance of alcohol and acetic acid bacteria. To fix this, ensure that your fermentation vessel is kept at a stable temperature between 60-80°F (15-27°C) and that it has adequate airflow.
- Off-Flavors: If your vinegar develops undesirable flavors, it could be due to contamination from unwanted bacteria or yeast strains. Always use sterilized equipment and clean water to minimize contamination risks. Additionally, using fresh ingredients will help maintain the desired flavor profile.
- Cloudiness: Cloudy vinegar often results from suspended particles or bacterial growth during fermentation. While cloudiness isn’t harmful, it may affect the appearance of your product. Filtering the vinegar through cheesecloth after fermentation can help achieve a clearer result.
- Low Acidity: If your homemade vinegar lacks acidity, it might not have fermented long enough or may require more sugar to feed the acetic acid bacteria properly. Extending the fermentation period and ensuring an adequate sugar source (like fruit juice or wine) should enhance acidity levels.
- Mold Growth: Mold on top of your fermenting liquid is a sign that something went wrong with hygiene practices or environmental conditions were too humid and warm without proper ventilation. Remove any moldy layers carefully without disturbing the rest of the batch and adjust storage conditions accordingly.
By addressing these common issues in DIY vinegar production, you can improve both the quality and consistency of your homemade vinegars, turning potential mistakes into valuable learning experiences for future batches!
The Benefits and Uses of Homemade Vinegar
Homemade vinegar offers a plethora of benefits and uses that make it a valuable addition to any household. One of the primary advantages of homemade vinegars is their purity and natural composition. Unlike commercial varieties, which may contain additives and preservatives, DIY vinegars are free from artificial ingredients, ensuring a healthier option for consumption.
The health benefits of natural vinegars are extensive. Rich in acetic acid, homemade vinegar can aid in digestion, help regulate blood sugar levels, and even support weight loss efforts. Additionally, the probiotics found in naturally fermented vinegars contribute to a healthy gut microbiome, enhancing overall well-being.
Beyond health advantages, the uses for DIY vinegars are incredibly versatile. In the kitchen, they serve as excellent bases for salad dressings, marinades, and pickling solutions. Their unique flavors can elevate dishes by adding depth and complexity. Outside of culinary applications, homemade vinegars can be used for cleaning purposes due to their antibacterial properties. They effectively remove stains and odors without relying on harsh chemicals.
In conclusion, the benefits and uses of homemade vinegar extend far beyond its basic function as an acidic ingredient. From promoting better health to providing eco-friendly cleaning solutions, natural vinegars offer numerous advantages that make them worth considering for any DIY enthusiast or health-conscious individual.

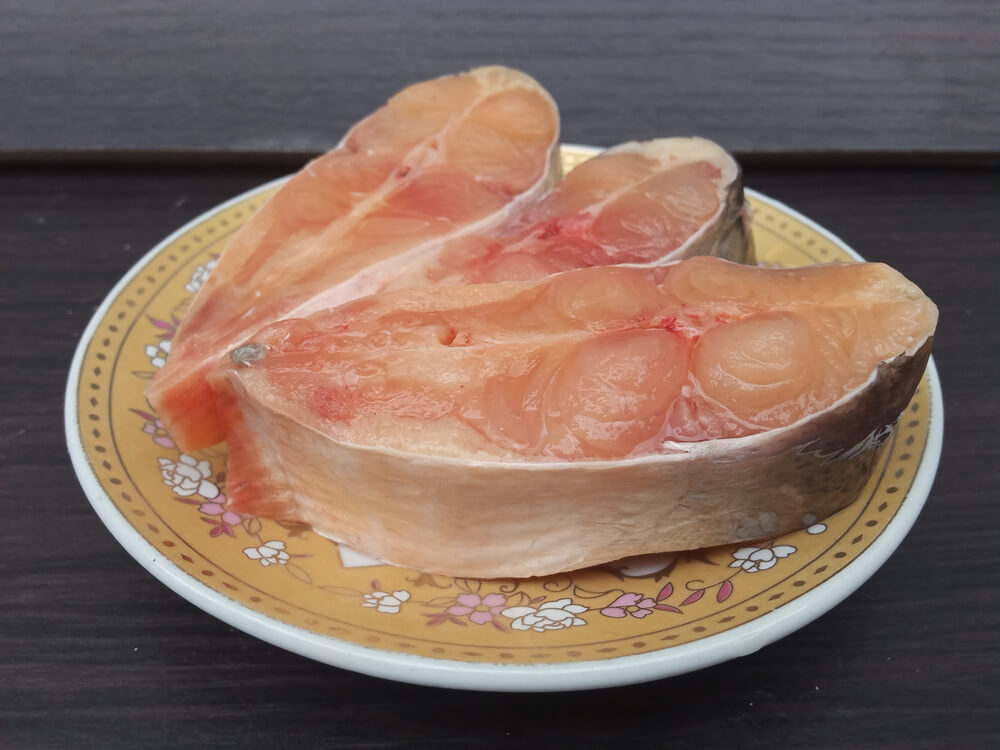
Swai fish, also known as Pangasius or iridescent shark, is a type of catfish commonly found in Southeast Asia, particularly Vietnam. It has gained popularity worldwide due to its mild flavor and affordability. But is Swai fish healthy? Let’s explore its nutritional profile, health benefits, potential risks, and the sustainability of its farming practices.
What is Swai Fish?
Swai fish, also known as Pangasius hypophthalmus, is a type of freshwater fish that belongs to the catfish family. Originating from the Mekong River in Southeast Asia, particularly Vietnam, swai has gained popularity worldwide due to its mild flavor and affordable price. This versatile fish is often used in various culinary dishes ranging from grilled fillets to fried and baked recipes.
One of the primary health benefits of swai fish is its relatively low calorie and fat content. A typical serving provides a good source of protein while maintaining a lower fat profile compared to other types of fish. Additionally, swai contains essential nutrients such as omega-3 fatty acids, which are known for their heart health benefits. These nutrients can help reduce inflammation and improve cardiovascular health.
However, it’s important to consider the origins and farming practices when choosing swai fish. Much of the commercially available swai comes from large-scale aquaculture operations in Vietnam where farming practices can vary significantly. Opting for responsibly sourced or certified swai ensures that you are consuming a product that meets higher standards for environmental impact and food safety.
Swai fish offers an affordable and nutritious option for those looking to incorporate more seafood into their diet. By understanding its origins and ensuring responsible sourcing, consumers can enjoy this versatile fish while benefiting from its health advantages.
Nutritional Profile of Swai Fish
Swai fish, also known as Pangasius or iridescent shark, is a popular choice for those seeking an affordable and mild-tasting seafood option. Understanding the nutritional profile of swai fish can help you make informed dietary choices.
When it comes to swai fish nutrition facts, a standard 4-ounce serving of cooked swai fillet contains approximately 90-100 calories. This makes it a low-calorie option suitable for those monitoring their caloric intake. In terms of protein content, the same serving size provides around 15 grams of protein, which is essential for muscle repair and growth.
Swai fish also offers a modest amount of essential nutrients. It contains small quantities of vitamins such as B12 and minerals like selenium and phosphorus. However, it’s worth noting that the nutritional value of swai fillet may not be as high in omega-3 fatty acids compared to other types of fatty fish like salmon or mackerel.
Swai fish is a low-calorie source of protein with some essential vitamins and minerals. While it may not be the most nutrient-dense seafood option available, its affordability and mild flavor make it an appealing choice for many households looking to incorporate more seafood into their diet.
Health Benefits of Eating Swai Fish
Swai fish, a type of catfish native to Southeast Asia, has become increasingly popular in many diets due to its health benefits and versatility in cooking. One of the primary questions people often ask is: “Is eating swai healthy?” The answer is yes, and here’s why.
Firstly, swai fish is an excellent source of low-calorie protein. A single serving provides a significant amount of protein while keeping calorie intake minimal, making it an ideal choice for those looking to maintain or lose weight without sacrificing essential nutrients.
Another notable benefit is the presence of omega-3 fatty acids in swai fish. Omega-3s are well-known for their positive effects on heart health. Consuming these fatty acids can help reduce inflammation, lower blood pressure, and decrease the risk of heart disease. Including swai fish in your diet can be a delicious way to support cardiovascular wellness.
In addition to being heart-healthy and low in calories, swai fish also offers essential vitamins and minerals that contribute to overall well-being. Its mild flavor allows it to be easily incorporated into various recipes without overpowering other ingredients.
Incorporating swai fish into your diet can provide numerous health benefits such as being a low-calorie protein source and supporting heart health through its omega-3 content. As with any food, it’s important to consume it as part of a balanced diet for optimal health benefits.
Potential Health Risks Associated with Swai Fish
Swai fish, a popular choice in many households due to its affordability and mild flavor, has recently come under scrutiny for potential health risks. One of the primary concerns is the mercury levels found in swai fish. Although generally considered low compared to other seafood, it’s important to monitor mercury intake, especially for vulnerable populations like pregnant women and young children.
Another significant issue is the presence of contaminants in swai fish. Being an imported seafood primarily farmed in Southeast Asia, swai often comes from regions where water quality regulations may not be as stringent as those in other parts of the world. This raises questions about the safety and cleanliness of these farming practices.
The broader topic of imported seafood risks also plays a role here. Imported fish can sometimes bypass rigorous safety checks, leading to potential exposure to harmful substances. This makes it crucial for consumers to be aware of where their seafood originates and how it was produced.
When comparing farmed vs wild-caught seafood safety, farmed swai often falls short due to overcrowded conditions that can lead to disease and contamination. While wild-caught options may offer a safer alternative, they are generally more expensive and less readily available.
While swai fish remains a budget-friendly option for many families, it’s essential to weigh these potential health risks carefully. Opting for well-regulated sources or choosing alternative types of fish with lower contaminant levels can help ensure a healthier diet without compromising on safety.
Sustainability and Environmental Concerns about Swai Farming
Swai, a type of catfish commonly found in Southeast Asia, has become a popular choice for consumers seeking affordable seafood. However, the sustainability and environmental impact of swai farming raise significant concerns that deserve attention.
One of the primary issues with swai farming is its environmental impact. Intensive aquaculture practices often lead to water pollution due to the discharge of fish waste, uneaten feed, and chemicals used in farming operations. This pollution can degrade local water quality and harm aquatic ecosystems. Additionally, the high density at which swai are farmed increases the risk of disease outbreaks, necessitating the use of antibiotics that can further contaminate water bodies.
Ethical concerns also come into play when discussing swai farming. Many farms operate under conditions that may not meet stringent animal welfare standards. Overcrowding and poor living conditions can lead to stress and suffering for the fish, raising questions about the ethicality of such practices.
For those looking to make sustainable seafood choices, it is crucial to consider these factors when purchasing swai. Opting for products certified by reputable sustainability organizations or choosing alternative species with lower environmental footprints can help mitigate some of these concerns.
While swai offers an economical option for seafood lovers, its farming practices present several sustainability and ethical challenges. Being informed about these issues allows consumers to make more responsible choices that support both environmental health and ethical aquaculture practices.
Should You Add Swai Fish to Your Food?
When considering whether to include Swai in your diet, it’s crucial to weigh both its benefits and potential drawbacks. Opting for responsibly sourced Swai from reputable suppliers can mitigate some of these concerns. As with any food choice, moderation is key.
In conclusion, while Swai fish can be a cost-effective and adaptable addition to your meals, ensuring you choose high-quality sources will help you enjoy its benefits without compromising on safety or sustainability.


Wahoo Fishing (Tips, Techniques, and Gear)

Things to Do in Salt Lake City (Attractions, Activities, and More)

7 Things to Do in Pigeon Forge with Kids- Creating Unforgettable Family Memories

How to Measure Ring Size Accurately at Home

How to Unclog a Toilet (A Step-by-Step Guide for Quick and Easy Fixes)
Things to Do in Salt Lake City (Attractions, Activities, and More)
-
 Fashion
How to Measure Ring Size Accurately at Home
-
 Home & Family
How to Unclog a Toilet (A Step-by-Step Guide for Quick and Easy Fixes)
-
 Destinations
Things to Do in Salt Lake City (Attractions, Activities, and More)
-

 Food & Beverage
What is Boba Made Of and How to Make It
-

 Internet Business
How to Handle Blackmail on Snapchat (A Guide to Protecting Yourself)
-

 Home & Family
Box Elder Bugs- Identification, Habitats, and Control
-
 Destinations
7 Things to Do in Pigeon Forge with Kids- Creating Unforgettable Family Memories
-
 Fishing
Wahoo Fishing (Tips, Techniques, and Gear)