Audio-Video Streaming
How to Block YouTube Ads? A Comprehensive Guide
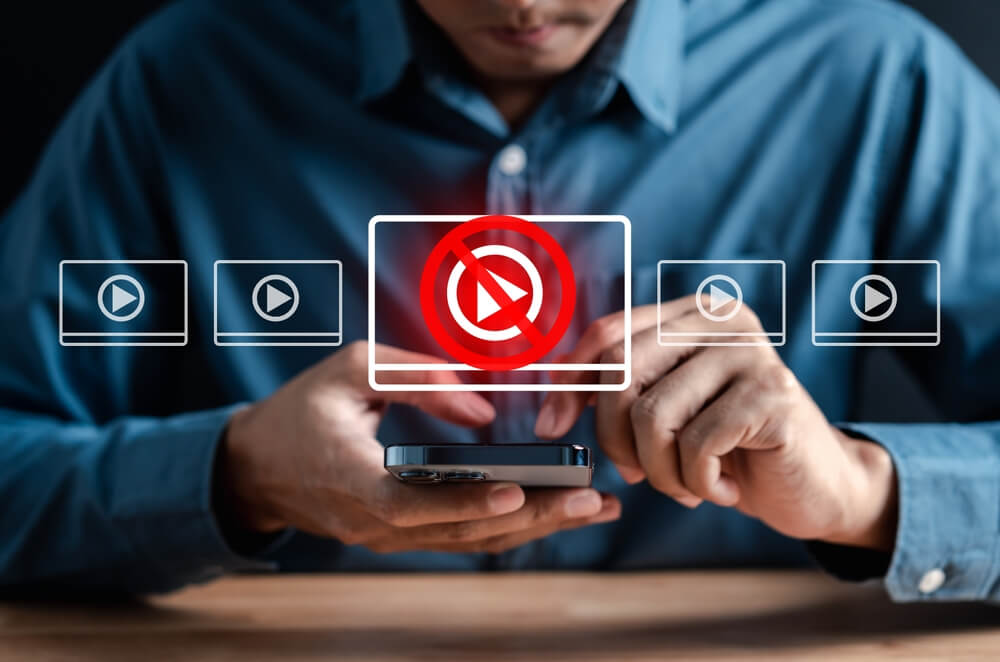
Online ads disrupt viewing. Blocking YouTube ads enhances enjoyment, saves time, and reduces distractions. This guide covers using extensions like Adblock Plus and uBlock Origin or subscribing to YouTube Premium for an ad-free experience. It also discusses mobile challenges and the ethics of ad-blocking, helping users make informed choices while considering content creators’ revenue.
Using Browser Extensions to Block YouTube Ads
In today’s digital age, uninterrupted browsing and streaming experiences are highly sought after. One common nuisance is the frequent ads on YouTube. Fortunately, using browser extensions can effectively block these interruptions, providing a smoother viewing experience.
An ad blocker extension is a tool that integrates with your web browser to filter out advertisements from websites, including YouTube. These extensions work by identifying and blocking ad scripts before they load on your page.
For users of Google Chrome, there are several options among the best ad blockers for Chrome that can efficiently block YouTube ads. Popular choices include AdBlock Plus and uBlock Origin, both known for their robust filtering capabilities and user-friendly interfaces.
If you’re using Firefox as your primary browser, you can also find effective solutions. A Firefox ad blocker like AdGuard or Ghostery can seamlessly remove ads from your YouTube viewing experience while offering additional privacy features.
Safari users aren’t left out either. With a dedicated Safari ad blocker, such as Wipr or Ka-Block!, you can enjoy an ad-free YouTube session on Apple’s native browser without compromising performance or security.
Whether you’re using Chrome, Firefox, or Safari, there are plenty of reliable extensions available to help you block YouTube ads with extensions effectively. By choosing the right tool for your browser, you can enhance your online experience significantly by eliminating those pesky interruptions once and for all.
YouTube Premium (An Ad-Free Solution Worth Considering?)
In an era where digital content consumption is at its peak, YouTube Premium offers a compelling option for avid viewers seeking an enhanced experience. The YouTube Premium subscription provides a range of benefits that go beyond just removing ads. For many users, the most immediate and noticeable advantage is the ability to enjoy videos without interruptions from advertisements. This feature alone can significantly improve the viewing experience, making it more seamless and enjoyable.
Beyond ad-free viewing, YouTube Premium also grants access to exclusive content through YouTube Originals. These are series and movies produced by YouTube that are available only to premium subscribers. Additionally, subscribers can download videos for offline viewing (a handy feature for those who travel frequently or have limited internet access).
Another notable benefit of YouTube Premium is background play. This allows users to continue listening to audio from videos even when they switch apps or turn off their device’s screen, making it perfect for multitasking or enjoying music videos as if they were playlists.
The cost of YouTube Premium varies by region but generally falls around $11.99 per month in the United States. While this may seem like a considerable expense, the array of features provided can make it a worthwhile investment for heavy users of the platform.
A YouTube Premium subscription offers several advantages that enhance user experience by removing ads, providing exclusive content, enabling offline downloads, and allowing background play. For those who spend significant time on YouTube and value these features, investing in this service could be well worth considering.
Blocking YouTube Ads on Mobile Devices
In today’s digital age, ads have become an integral part of the online experience, especially on platforms like YouTube. However, for many users, these ads can be intrusive and disruptive. Fortunately, there are several methods to block ads on mobile devices, whether you’re using Android or iOS.
For Android users looking to block ads on YouTube, there are a variety of mobile ad blocking apps available. One popular option is AdGuard, which offers robust ad-blocking capabilities across different apps and browsers. Another effective tool is Blokada, an open-source app that not only blocks ads but also enhances privacy by blocking trackers.
iOS users also have several options to choose from when it comes to ad blockers for YouTube. Apps like AdBlock and 1Blocker are highly recommended for their ease of use and effectiveness in filtering out unwanted advertisements. These iOS ad blockers work by integrating with Safari and other browsers to ensure a smoother viewing experience.
Additionally, both Android and iOS users can benefit from browser-based solutions such as Brave Browser or Firefox Focus. These browsers come with built-in ad-blocking features that automatically filter out ads on websites including YouTube.
Understanding how to block ads on mobile devices can significantly enhance your viewing experience by eliminating interruptions and allowing you to enjoy content seamlessly. Whether you opt for dedicated mobile ad blocking apps or browser-based solutions, the key is finding the method that best suits your needs while ensuring compatibility with your device’s operating system.
The Ethical Debate (Should We Block YouTube Ads?)
The ethics of blocking ads on YouTube is a multifaceted issue that has sparked considerable debate. On one hand, many viewers find ads disruptive and opt to use ad-blocking software to enhance their viewing experience. However, this practice raises important ethical questions, particularly regarding the support of content creators.
One of the primary arguments against blocking ads is that it can negatively impact content creators. Many YouTubers rely on ad revenue as a significant source of income. By watching ads, viewers directly support these creators and enable them to continue producing high-quality content. When ads are blocked, the revenue stream diminishes, potentially hindering the creator’s ability to sustain their channel.
On the other hand, there are valid reasons why some choose to block ads. For instance, excessive or intrusive advertising can degrade user experience and deter viewers from engaging with content altogether. Additionally, concerns about privacy and data tracking associated with online advertisements prompt some users to adopt ad-blocking measures.
Weighing the pros and cons of blocking ads on YouTube involves considering both personal convenience and broader ethical implications. While ad-blockers offer a more streamlined viewing experience free from interruptions, they also challenge the financial ecosystem that supports free online content.
Each viewer must decide where they stand in this ethical debate. Balancing personal preferences with an understanding of how ad revenue sustains content creators can lead to more informed choices about using ad-blocking tools on platforms like YouTube.
Troubleshooting Common Issues with Ad Blockers
Ad blockers are invaluable tools for enhancing your browsing experience by removing intrusive advertisements. However, they can sometimes encounter issues, particularly on platforms like YouTube or websites that deploy anti-adblock measures. Here’s how to troubleshoot some of the most common problems:
1. Ad Blocker Not Working on YouTube?
If your ad blocker isn’t effectively blocking ads on YouTube, it might be due to recent changes in YouTube’s ad delivery system. To fix this:
– Update Your Ad Blocker: Ensure that you have the latest version of your ad blocker installed. Developers frequently update their software to counter new ad formats.
– Check Your Filters: Make sure that your filter lists are up-to-date. Most ad blockers use filter lists to identify and block ads.
– Switch Browsers: Sometimes switching to a different browser can resolve the issue if one browser has better support for certain extensions.
2. Bypassing Anti-Adblock Measures
Many websites have started using anti-adblock scripts to detect and block users who employ ad blockers. To bypass these measures:
– Use Custom Filters: Some advanced users create custom filters specifically designed to counter anti-adblock scripts.
– Enable Stealth Mode: Some ad blockers come with a stealth mode or similar feature that helps in masking the presence of an ad blocker.
– Alternative Extensions: Consider using additional privacy-focused extensions alongside your primary ad blocker, such as script-blocking tools.
3. Fixing General Ad Blocker Issues
If you’re experiencing general issues with your ad blocker, such as it not working across multiple sites:
– Reinstall the Extension: Sometimes simply reinstalling the extension can resolve any underlying issues.
– Clear Browser Cache: Clearing your browser’s cache and cookies can help eliminate any conflicts causing the problem.
– Review Extension Permissions: Ensure that your extension has all necessary permissions enabled to function correctly.
By following these troubleshooting steps, you should be able to resolve most common issues associated with using an ad blocker and continue enjoying an uninterrupted browsing experience.

Audio-Video Streaming
How to Record on YouTube TV- A Comprehensive Guide
Recording content on YouTube TV lets you enjoy shows and movies at your convenience, free from live broadcast schedules. This guide will walk you through recording content, managing recordings with unlimited DVR storage, troubleshooting issues, and understanding the unique benefits of YouTube TV. Unlock the full potential of your subscription.
Step-by-Step Guide to Recording Content on YouTube TV
Recording content on YouTube TV is a straightforward process that allows you to never miss your favorite shows and events. Here’s a step-by-step guide to help you understand how to record a show on YouTube TV:
1. Open YouTube TV: Launch the YouTube TV app on your device or visit the website on your browser.
2. Find Your Show: Use the search bar or browse through the channels and categories to find the show, movie, or event you want to record.
3. Add Program to DVR: Once you’ve located the program, click on it to open its details page. Look for the “+ Add” button (sometimes displayed as a “+” icon). Clicking this will add the program to your DVR library.
4. Confirm Recording: After adding, you’ll see an indicator that confirms your program has been added for recording. This ensures that all upcoming episodes of the show will be recorded automatically.
5. Manage Recordings: To manage your recordings, go to “Library” in YouTube TV’s menu. Here, you can view all scheduled recordings and access previously recorded content.
6. Playback Options: Recorded shows are stored in your library for up to nine months, allowing you ample time to watch them at your convenience.
By following these simple recording instructions within this comprehensive YouTube TV guide, you’ll be able to effortlessly add programs to DVR and enjoy uninterrupted viewing of all your favorite content whenever it suits you best.
Managing Your Recorded Content
Effectively managing your recorded content on YouTube TV can enhance your viewing experience. Understanding the playback options and storage limits is essential for optimizing how you use the platform.
YouTube TV offers a versatile DVR feature that allows you to record shows, movies, and sports events. One of the standout features is its unlimited storage capacity for recordings. This means that users do not have to worry about deleting older recordings to make space for new ones. However, it’s important to note that these recordings are only stored for up to nine months. After this period, they are automatically deleted from your library.
When it comes to playback options, YouTube TV provides a user-friendly interface that makes accessing your recorded content straightforward. Users can easily navigate through their library and select any show or event they have recorded. The platform also supports fast-forwarding through commercials on most recordings, which can save valuable time during playback.
To manage your recorded shows efficiently, consider organizing them into categories or creating a watchlist of priority content. Regularly checking and updating this list ensures you don’t miss out on watching any of your favorite programs before they expire.
while YouTube TV’s DVR offers generous storage limits and flexible playback options, proactive management of your recorded content is key to making the most out of these features. By staying organized and aware of expiration timelines, you can enjoy a seamless viewing experience tailored to your preferences.
Troubleshooting Common Issues with YouTube TV Recording
Experiencing problems with YouTube TV recording can be frustrating, but many common issues have straightforward solutions. Here’s a troubleshooting guide to help you fix DVR issues on YouTube TV and ensure your recordings run smoothly.
1. Check Your Internet Connection
One of the most frequent causes of YouTube TV recording problems is a poor internet connection. Ensure that your device is connected to a stable network. A high-speed internet connection is crucial for seamless recording and playback.
2. Storage Limitations
Although YouTube TV offers unlimited storage for recordings, there are occasional limitations based on the number of programs recorded simultaneously or regional restrictions. Make sure you haven’t hit any such limits by reviewing your library and deleting unnecessary recordings.
3. Update the App
Outdated software can lead to various glitches, including common recording errors. Ensure that your YouTube TV app is updated to the latest version available in the app store for your device.
4. Device Compatibility
Certain older devices may not support all features of YouTube TV, including advanced DVR functionalities. Verify that your device meets the necessary requirements by checking YouTube TV’s official compatibility list.
5. Restart Your Device
Sometimes, a simple restart can resolve numerous technical issues, including those affecting video recordings on YouTube TV. Power off your device completely and then turn it back on before attempting another recording.
6. Clear Cache and Data
Accumulated cache and data can cause performance issues in streaming apps like YouTube TV. Navigate to your device settings, find the app management section, select YouTube TV, and clear its cache and data.
By following this troubleshooting guide for recordings on YouTube TV, you can address many common recording errors efficiently and enjoy uninterrupted access to your favorite shows and movies.
The Benefits of Unlimited DVR Storage with YouTube TV
One of the standout features of YouTube TV is its unlimited DVR storage, which offers a multitude of benefits for users. Unlimited DVR storage benefits are numerous, making it an attractive option for those who rely heavily on recording their favorite shows and movies. With cloud-based recordings, YouTube TV ensures that your content is securely stored and easily accessible from any device.
One significant advantage of unlimited storage space for recordings is the ability to save as many programs as you want without worrying about running out of space. This means you can record entire seasons of your favorite series or multiple sporting events simultaneously without having to delete older recordings to make room for new ones.
Another benefit is the flexibility it provides. Since all your recordings are stored in the cloud, you can access them from anywhere with an internet connection. This eliminates the need for physical DVR hardware and allows you to watch your saved content on various devices, whether it’s a smart TV, tablet, or smartphone.
In addition to convenience and flexibility, unlimited DVR storage also enhances user experience by offering personalized recommendations based on your viewing habits. By analyzing the content you’ve recorded and watched, YouTube TV can suggest similar shows or movies that align with your interests.
Overall, the advantages of unlimited DVR storage with YouTube TV make it a compelling choice for viewers who value convenience, flexibility, and a personalized entertainment experience.
Frequently Asked Questions About Recording on YouTube TV
Recording shows on YouTube TV can be a convenient way to ensure you never miss your favorite programs. Here, we address some of the most common questions about recording shows on this popular streaming service.
1. How do I record a show on YouTube TV?
To record a show, simply find the program you want to record and select it. Then, click on the “+” button next to the show’s title. This action will add the show to your library and set it up for automatic recording whenever new episodes air.
2. Is there a limit to how many shows I can record?
One of the standout features of YouTube TV’s DVR is that it offers unlimited storage space for recordings. However, keep in mind that recorded content is only stored for up to nine months before it is automatically deleted.
3. Can I fast-forward through commercials in my recorded shows?
Yes, you can fast-forward through commercials in most recorded content on YouTube TV. This feature makes it easy to skip ads and get straight back into your favorite programs.
4. Are there any restrictions on what I can record?
While most live broadcasts and cable channels are available for recording, certain restrictions may apply based on network agreements and regional availability. Always check specific channel guidelines within YouTube TV’s interface.
5. How do I access my recordings?
Your recorded shows are stored in your Library under “Recorded.” From here, you can easily access all your saved content by selecting the desired program from the list.
For more detailed information or additional questions about using YouTube TV’s DVR functionality, refer to their official support page or contact customer service directly.
Audio-Video Streaming
How to Cancel Amazon Music Before Your Next Billing Cycle
There are numerous reasons why you might need to cancel your Amazon Music subscription immediately. Whether it’s due to budget constraints, a preference for another music streaming service, or simply not using the service as much as you anticipated, knowing how to cancel your subscription efficiently can save you money and hassle.
Step-by-Step Guide How to Cancel Amazon Music on Desktop
Canceling your Amazon Music membership on a desktop is a straightforward process. Follow these steps to ensure you successfully end your subscription:
1. Log into Your Amazon Account: Open your preferred web browser and navigate to the Amazon website. Enter your login credentials to access your account.
2. Go to Your Account Settings: Once logged in, hover over the “Accounts & Lists” option at the top right corner of the page and select “Memberships & Subscriptions” from the dropdown menu.
3. Locate Your Amazon Music Subscription: In the Memberships & Subscriptions section, find “Amazon Music Unlimited” or any other applicable music service you are subscribed to.
4. Manage Subscription: Click on “Manage Subscription” next to your Amazon Music membership details.
5. Cancel Subscription: You will be redirected to a new page where you can see all details about your subscription plan. Look for an option that says “Cancel” or “End Membership” and click on it.
6. Confirm Cancellation: Follow any additional prompts that ask for confirmation of cancellation. This may include answering why you’re choosing to unsubscribe from Amazon Music or confirming one last time that you want to stop the service.
7. Receive Confirmation Email: After completing these steps, you should receive an email confirming that you’ve successfully unsubscribed from Amazon Music and detailing when your current access will end.
By following this step-by-step guide, you’ll be able to cancel your Amazon Music membership efficiently using a desktop computer, ensuring there are no unexpected charges moving forward.
How to Cancel Amazon Music Subscription on Mobile Devices (Android & iOS)
Canceling your Amazon Music subscription on mobile devices is a straightforward process, whether you’re using an Android or iOS device. Here’s a step-by-step guide to help you through the process.
On Android
1. Open the Amazon Music App: Launch the app and ensure you’re logged in with your account.
2. Access Settings: Tap on the three horizontal lines (menu icon) located in the upper-left corner of the screen, then select “Settings.”
3. Manage Subscriptions: Scroll down and tap on “Amazon Music Unlimited” under the “Account Settings” section.
4. Cancel Subscription: Select “Cancel subscription,” then follow any additional prompts to confirm your cancellation.
On iOS
1. Open Settings App: Go to your device’s main settings by tapping on the gear icon.
2. Apple ID & Subscriptions: Tap on your Apple ID at the top of the screen, then select “Subscriptions.”
3. Select Amazon Music: Find and tap on “Amazon Music” from your list of active subscriptions.
4. Stop Subscription: Tap “Cancel Subscription” and follow any confirmation prompts to finalize canceling.
By following these steps, you can easily cancel your Amazon Music subscription directly from your mobile device, regardless of whether you use an Android or iOS platform. This ensures that you have control over managing your subscriptions conveniently right from your phone.
Avoiding Common Pitfalls (Ensuring Your Amazon Music Cancellation is Successful)
Cancelling your Amazon Music subscription should be a straightforward process, but there are common pitfalls that can complicate the procedure. Understanding these issues and how to avoid them will help ensure a successful cancellation.
One of the most frequent amazon music cancellation issues arises from not following the correct steps within your Amazon account settings. To ensure successful cancellation, navigate to your account settings, select ‘Memberships & Subscriptions,’ and locate Amazon Music. From there, follow the prompts to cancel your subscription.
Another common problem when cancelling a subscription is timing. If you cancel too close to your billing date, you might still be charged for the next cycle. To avoid this, make sure you initiate the cancellation at least a few days before your next billing date.
Lastly, always confirm that you’ve received an email from Amazon verifying that your subscription has been cancelled. This confirmation serves as proof and can help resolve any future disputes regarding unexpected charges.
By being aware of these common pitfalls and taking proactive steps to address them, you can ensure that your Amazon Music cancellation is smooth and hassle-free.
Confirming the Cancellation (How to Verify That Your Amazon Music Account is Closed)
Ensuring that your Amazon Music account is properly canceled is crucial to avoid any unexpected charges. Here’s a step-by-step guide to verify the cancellation and confirm that your account is indeed closed.
1. Check Your Email for Confirmation:
After initiating the cancellation process, Amazon typically sends a confirmation email. This email will include details about the cancellation and serve as an official record. Make sure to check both your inbox and spam folder for this message.
2. Log into Your Amazon Account:
Go to the Amazon website and log into your account. Navigate to “Your Memberships & Subscriptions” under “Account & Lists.” This section will list all active subscriptions associated with your account.
3. Verify Subscription Status:
In “Your Memberships & Subscriptions,” look for your Amazon Music subscription. If it has been successfully canceled, it should either not appear in the list or be marked as inactive or expired.
4. Check Billing Statements:
Review recent billing statements from Amazon on both their site and through your bank or credit card provider. Ensure there are no charges related to Amazon Music after you’ve requested cancellation.
5. Contact Customer Service:
If you’re still unsure whether your cancellation went through, contact Amazon’s customer service directly via chat, phone, or email for confirmation. Provide them with any relevant information such as dates or reference numbers from emails you received during the cancellation process.
By following these steps, you can confidently verify that your Amazon Music account is closed and rest assured that no further charges will occur on this subscription service.
Troubleshooting (What to Do If You’re Still Being Charged After Cancelling Amazon Music?)
If you find yourself still charged after cancelling your Amazon Music subscription, it can be frustrating and confusing. Here’s a step-by-step guide to help you resolve this billing issue.
1. Verify Cancellation: First, double-check that your cancellation was processed correctly. Log into your Amazon account, navigate to “Your Memberships & Subscriptions,” and ensure that Amazon Music is listed as cancelled.
2. Check Billing Dates: Sometimes, charges may appear due to the billing cycle timing. Review your billing statements to see if the charge occurred before or after the cancellation date.
3. Dispute Billing Issue: If you’re certain that the charge is incorrect, initiate a dispute with Amazon’s customer service. Go to “Help & Customer Service” on the Amazon website and select “Contact Us.” Provide all relevant details about your subscription and cancellation.
4. Request Refund: During your communication with customer service, explicitly request a refund for any post-cancellation charges. Be clear and concise about why you believe these charges are erroneous.
5. Follow Up: Keep track of all communications with customer service representatives and follow up if necessary until the issue is resolved satisfactorily.
By following these steps, you can effectively address any post-cancellation charges on your account and ensure that you’re not paying for a service you’ve opted out of using.
-

 Fashion
How to Measure Ring Size Accurately at Home
-

 Home & Family
How to Unclog a Toilet (A Step-by-Step Guide for Quick and Easy Fixes)
-

 Destinations
Things to Do in Salt Lake City (Attractions, Activities, and More)
-

 Food & Beverage
What is Boba Made Of and How to Make It
-

 Internet Business
How to Handle Blackmail on Snapchat (A Guide to Protecting Yourself)
-

 Home & Family
Box Elder Bugs- Identification, Habitats, and Control
-

 Destinations
7 Things to Do in Pigeon Forge with Kids- Creating Unforgettable Family Memories
-

 Fishing
Wahoo Fishing (Tips, Techniques, and Gear)
